Software
The machine is operated by use of the LCD display, two (2) joysticks, rotating knob and start and stop buttons on the control panel.
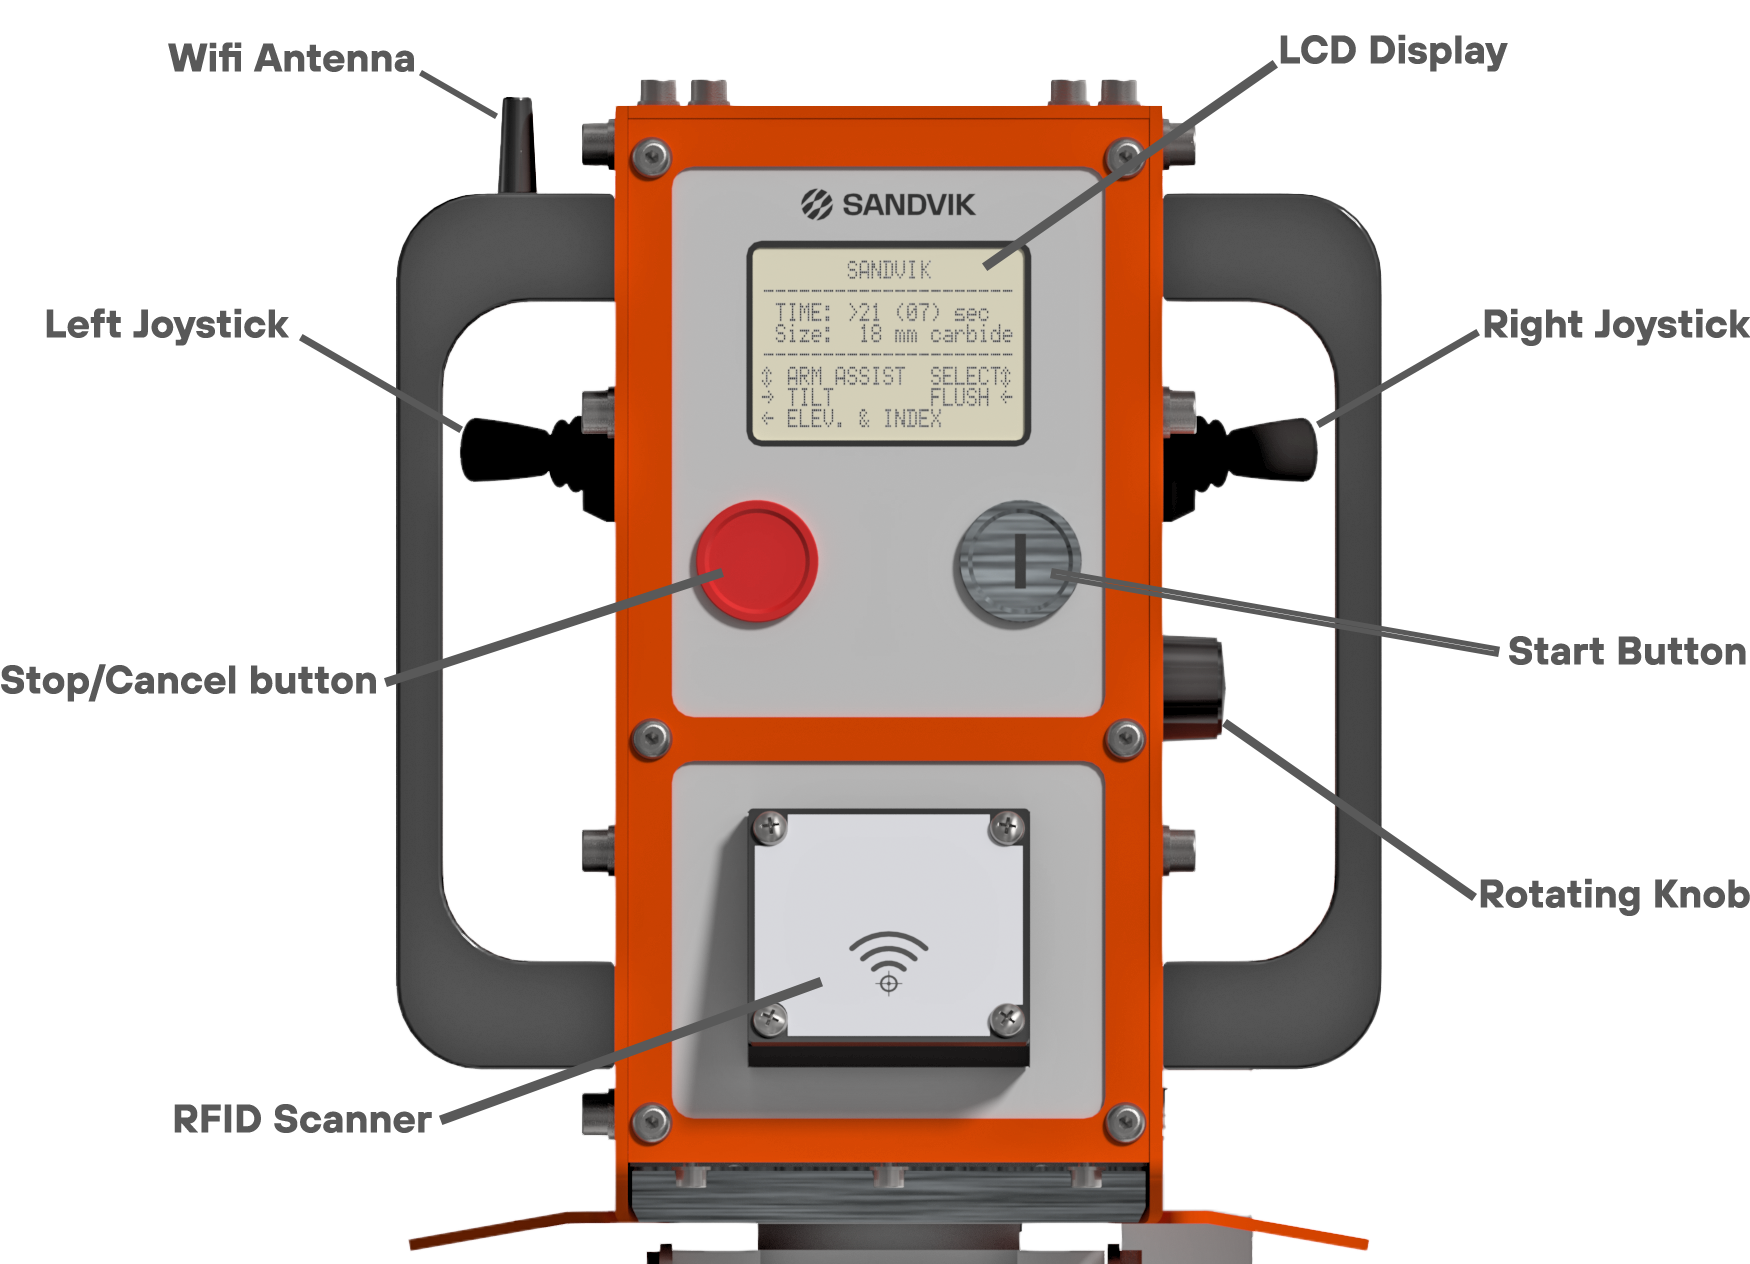
There are two general pages which give you all the functionality to operate your Sharpener
|
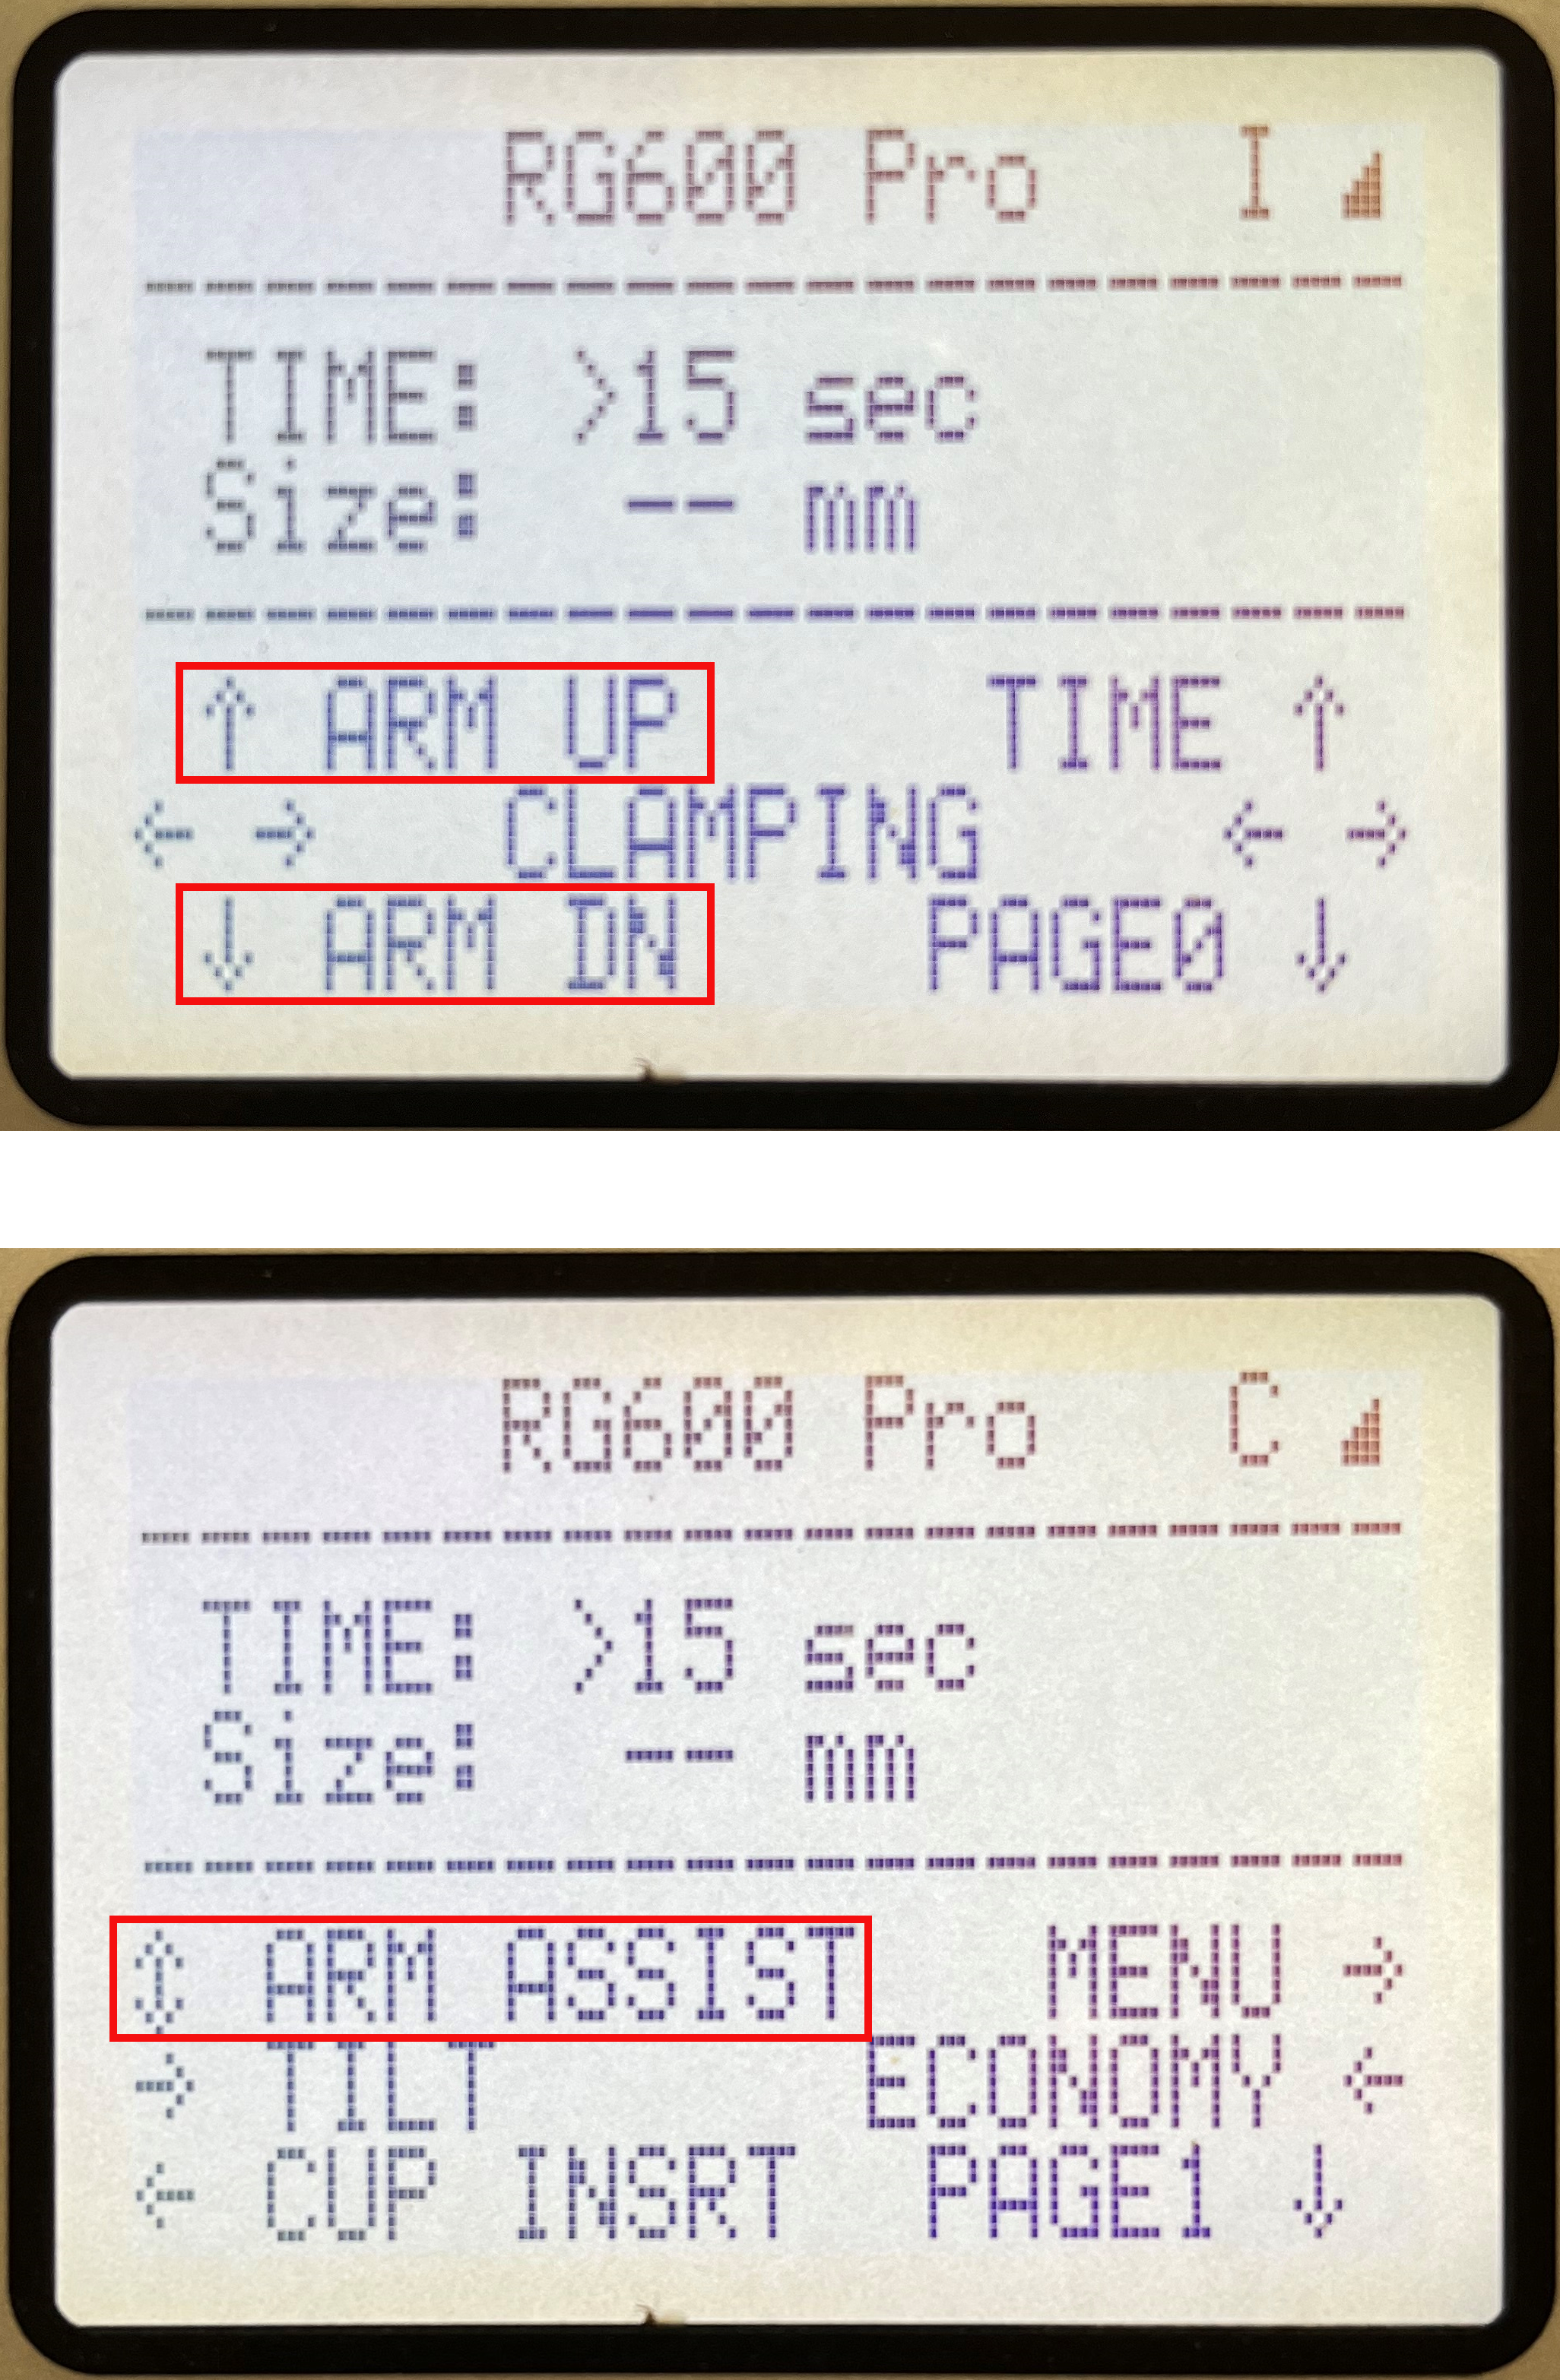
Page 0 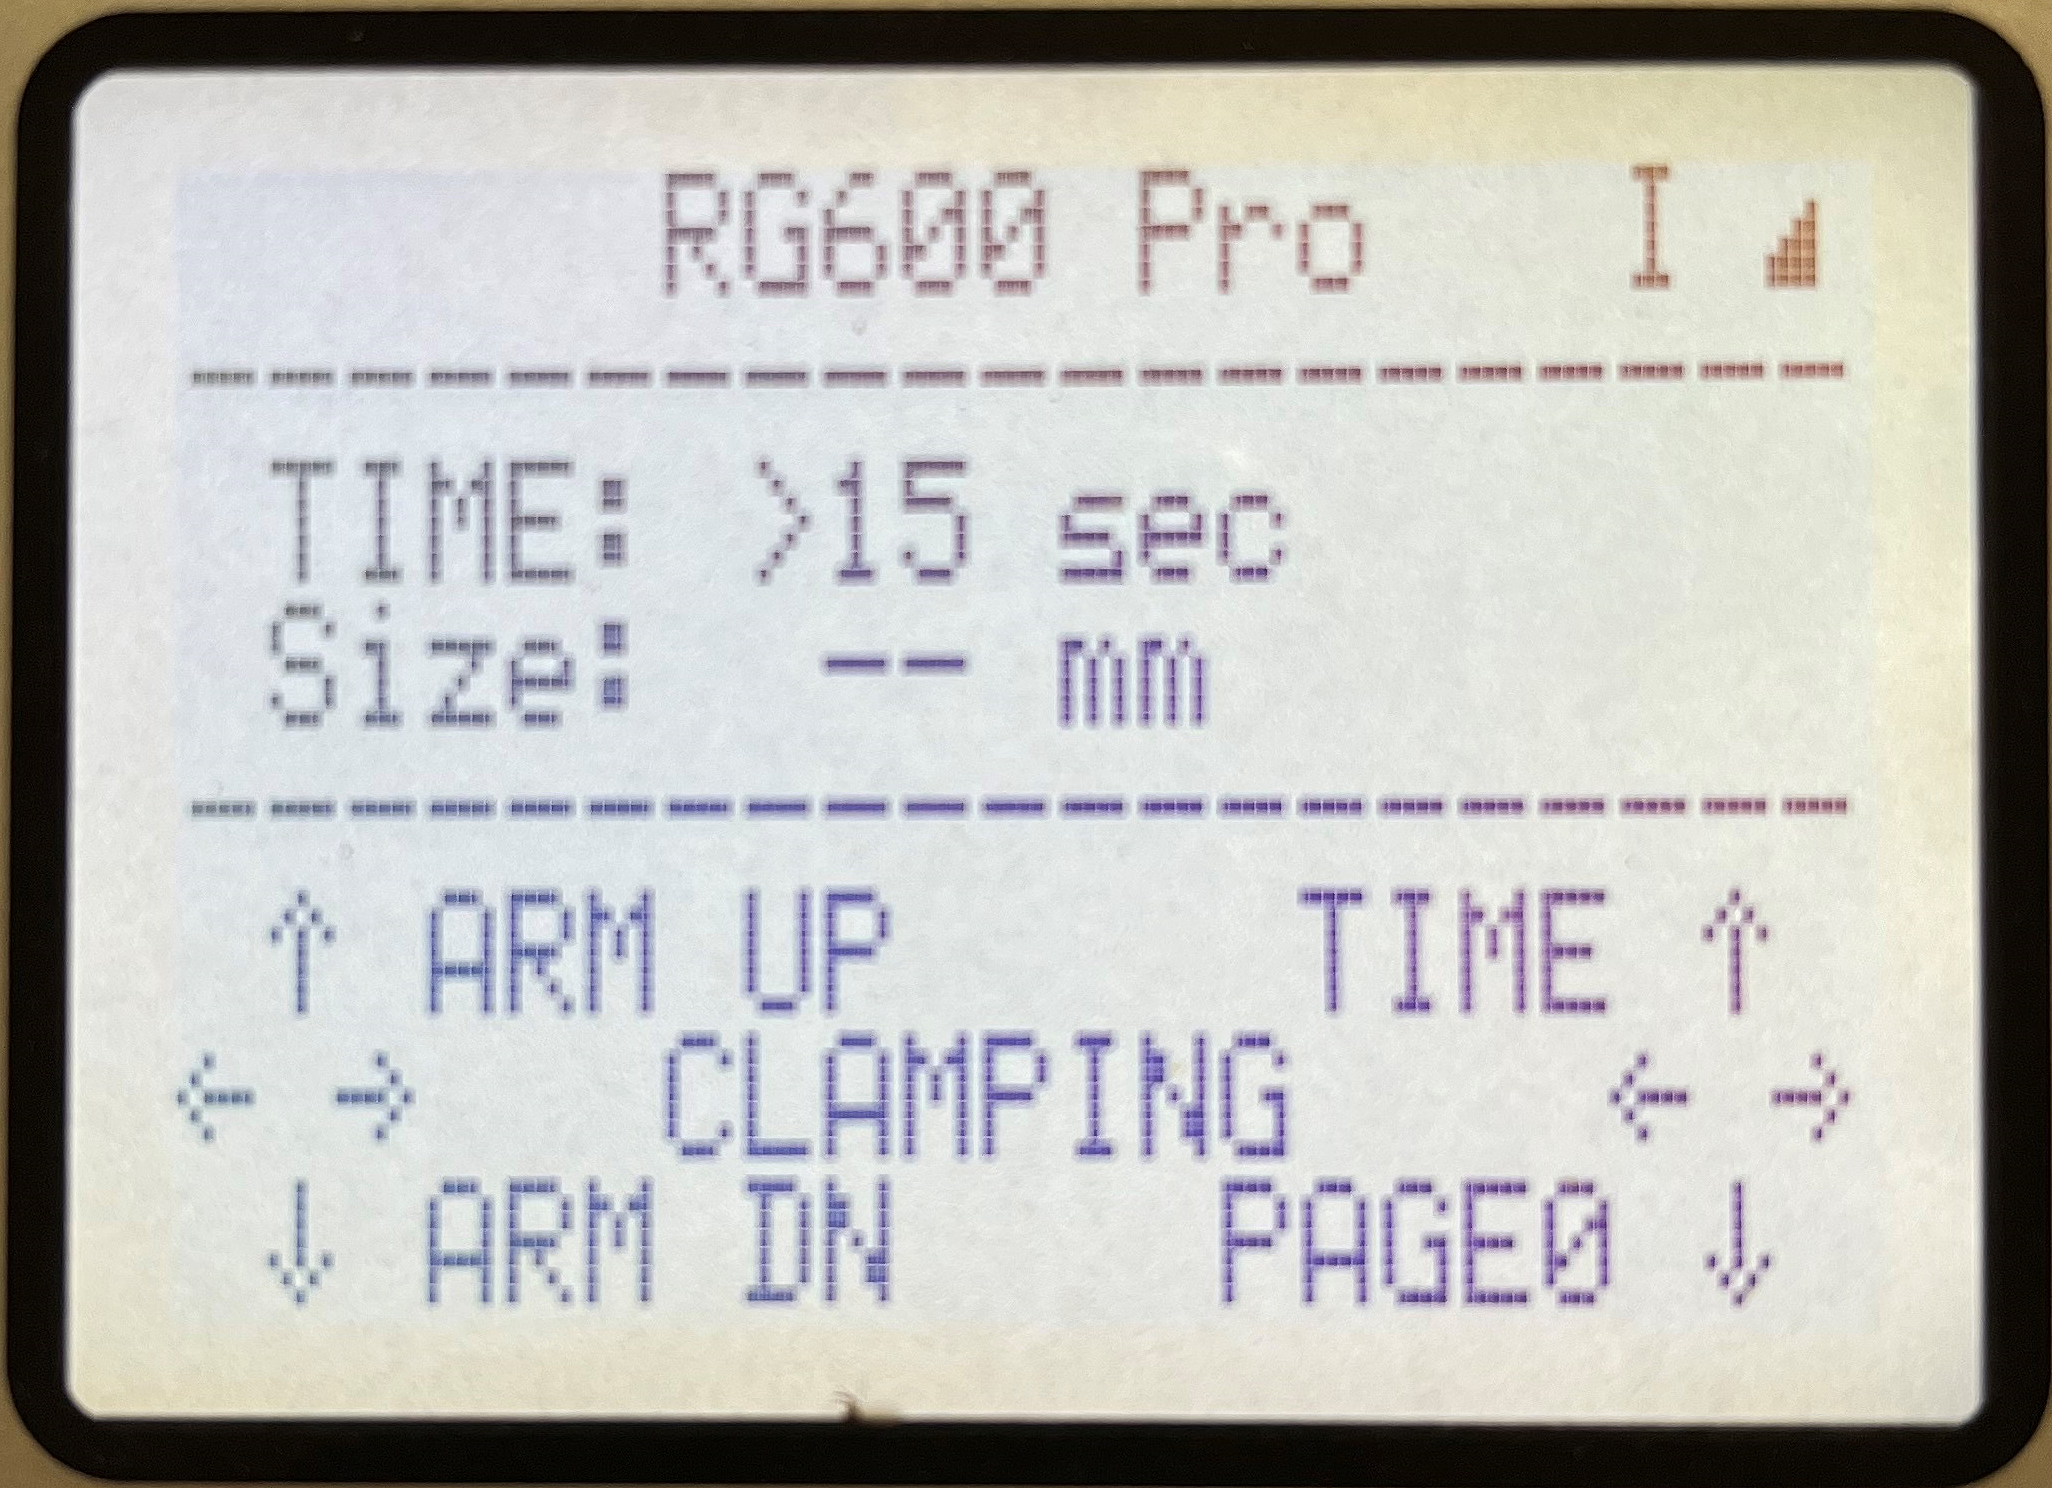 |
Page 1 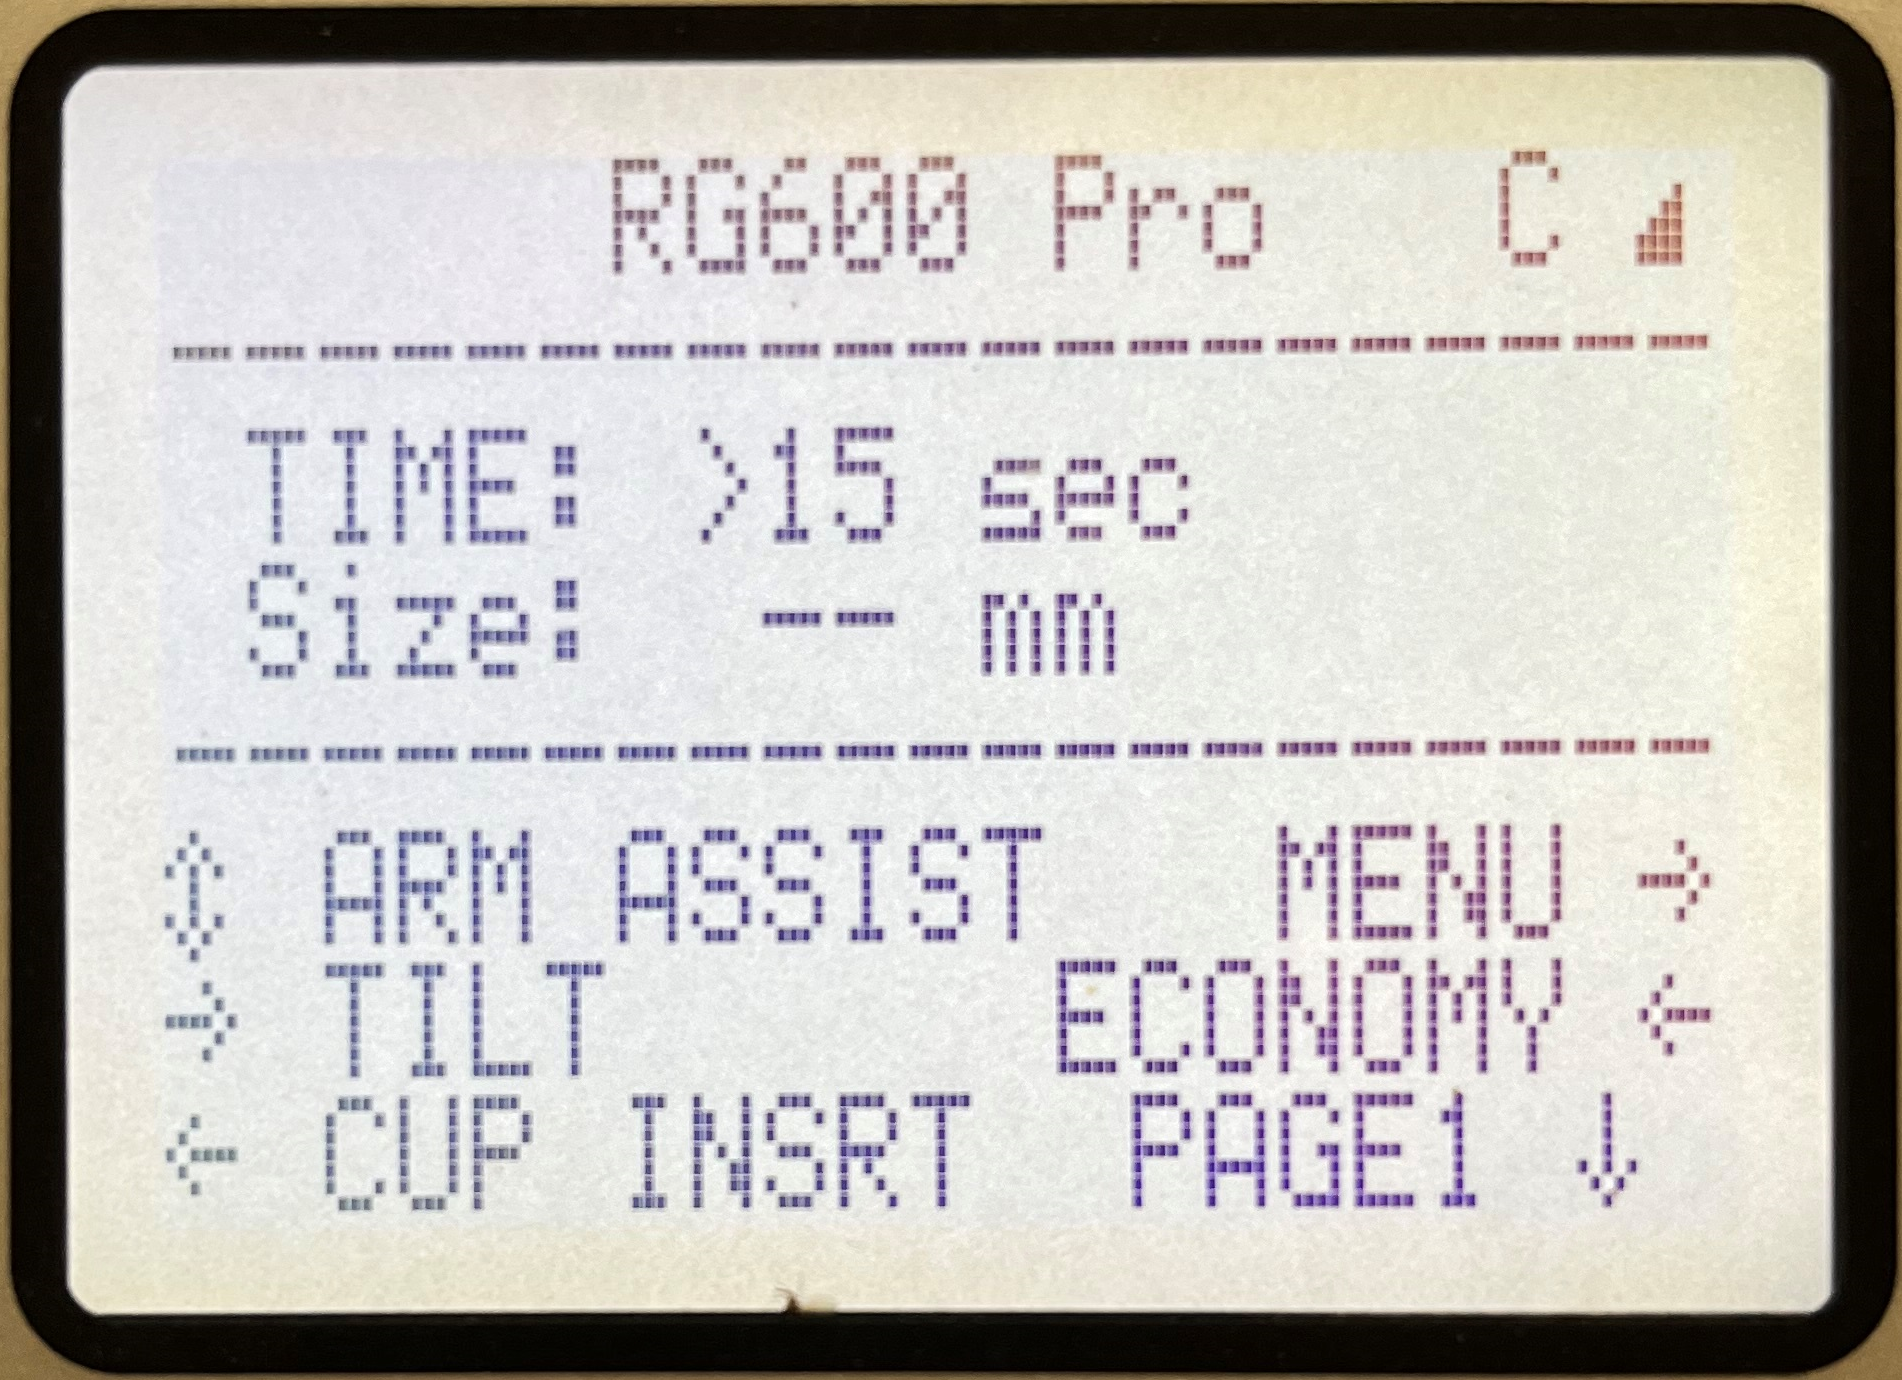 |
|
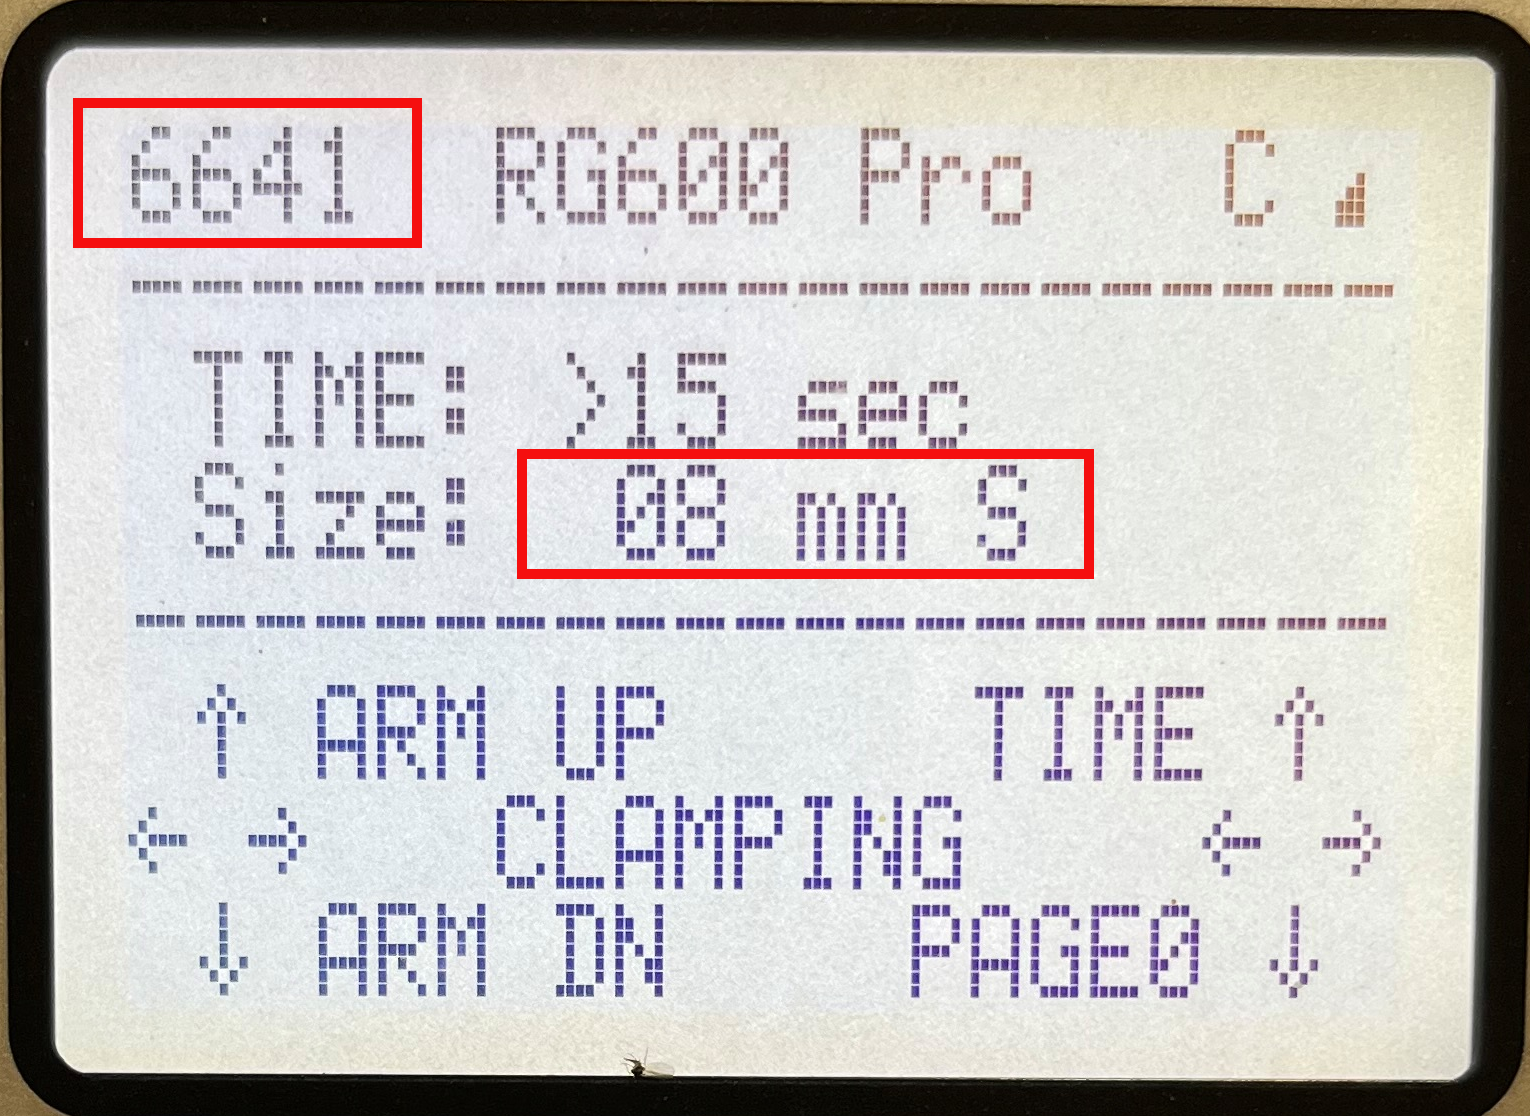
We recommend your machine be connected to a Wifi network at all times. When the machine is connected, the Wifi symbol will appear in the top right hand corner of the display There will also be a letter: either an "I" or a "C" "I" = connected to Wifi "C" = connected to server for synchronisation |
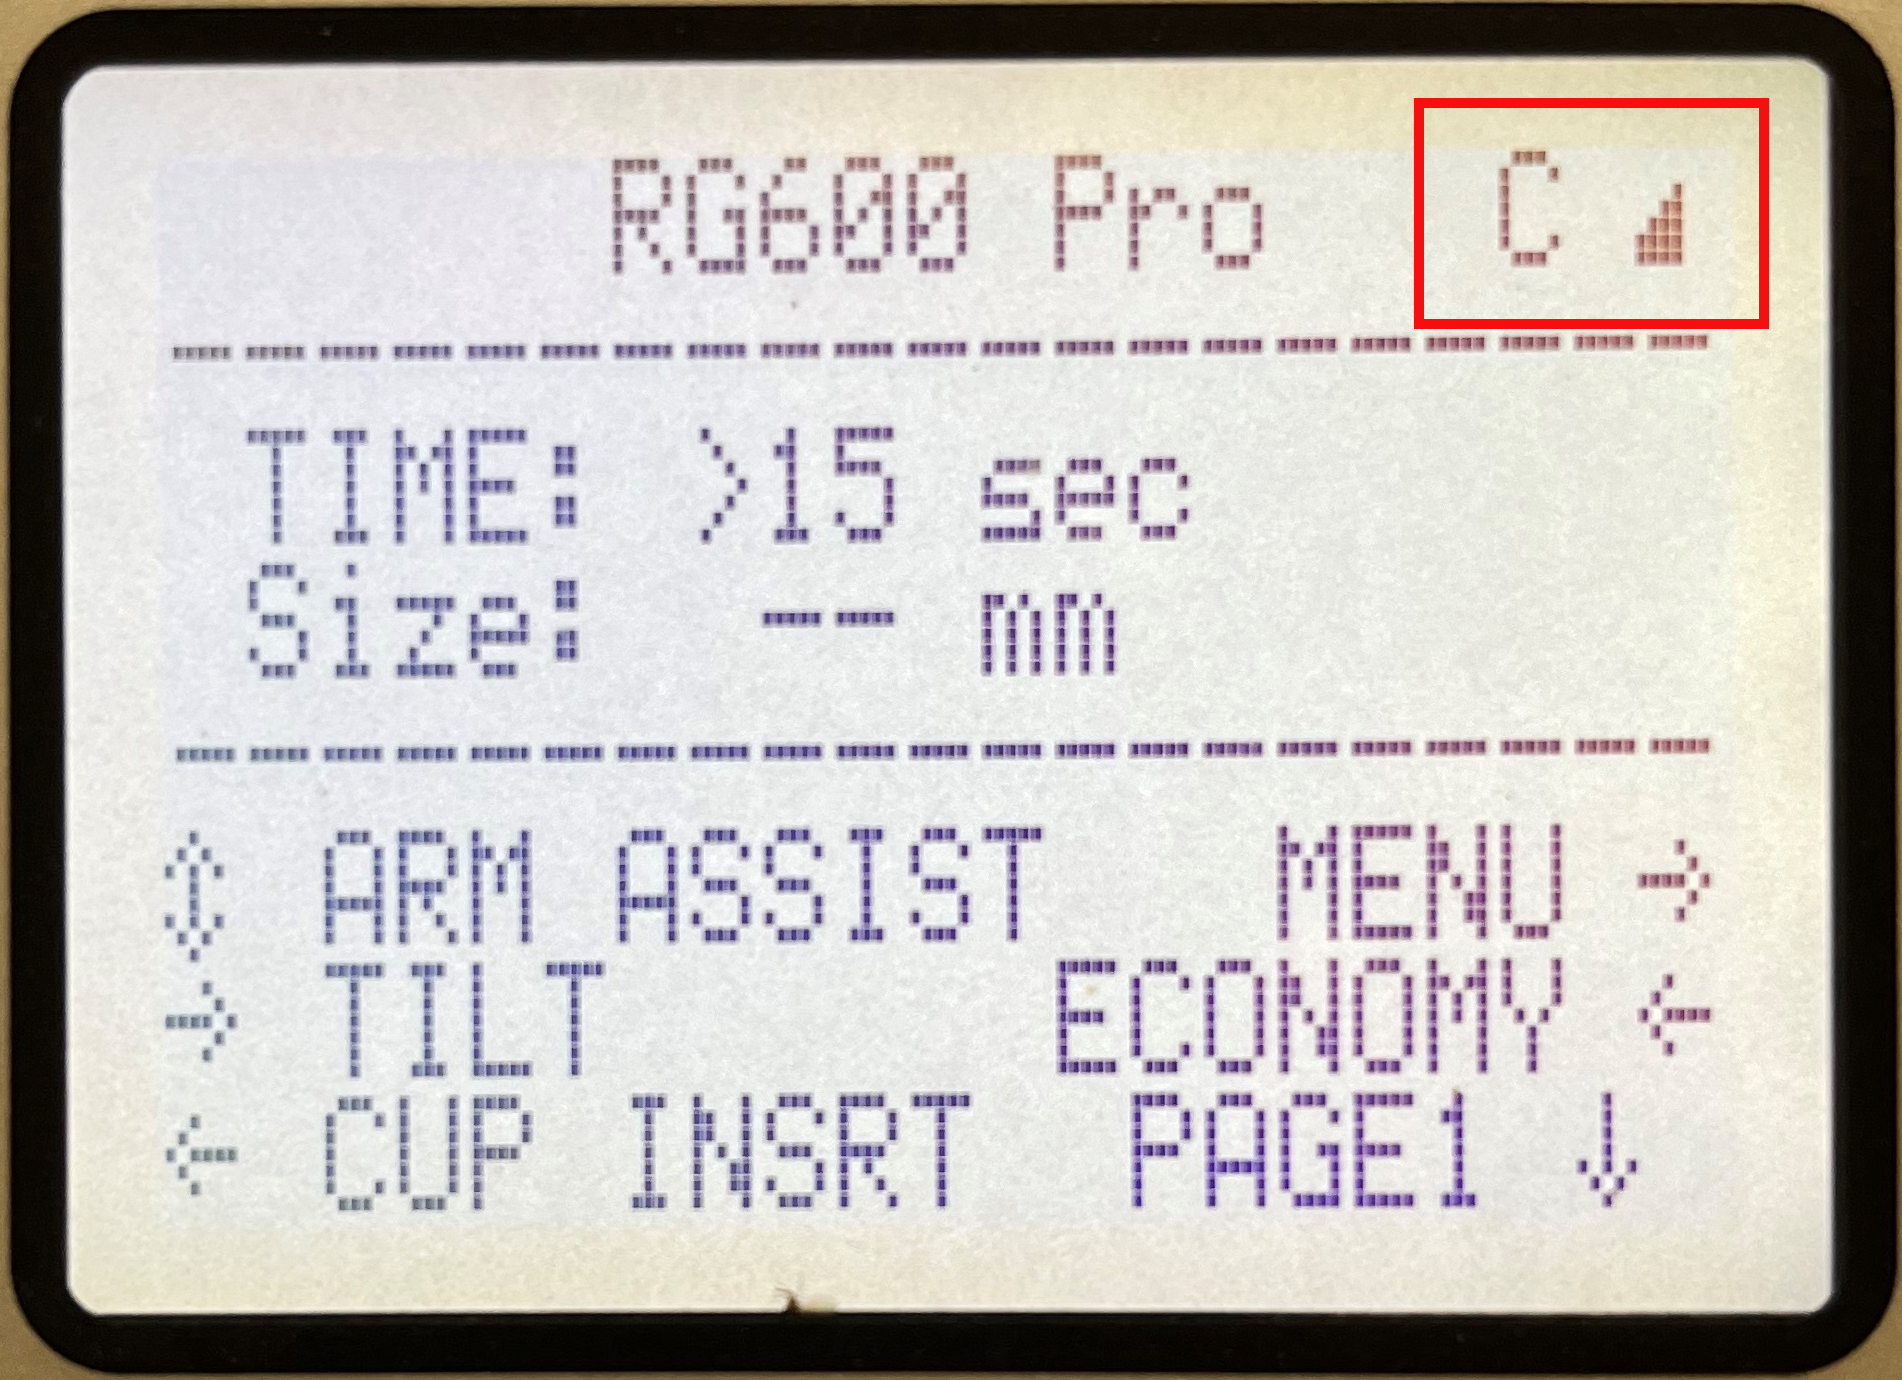 |
More information on how to connect to a Wifi network will be provided in module 3: Machine Operation.
|
That arm can be moved up and down by pushing the Left Joystick up or down respectively. This can be done in both page 0 and page 1. Since the arm is balanced using the pneumatic cylinder, the control panel can also be moved up and down by gripping the handles and gently pushing/pulling the control panel up and down. |
 |
|
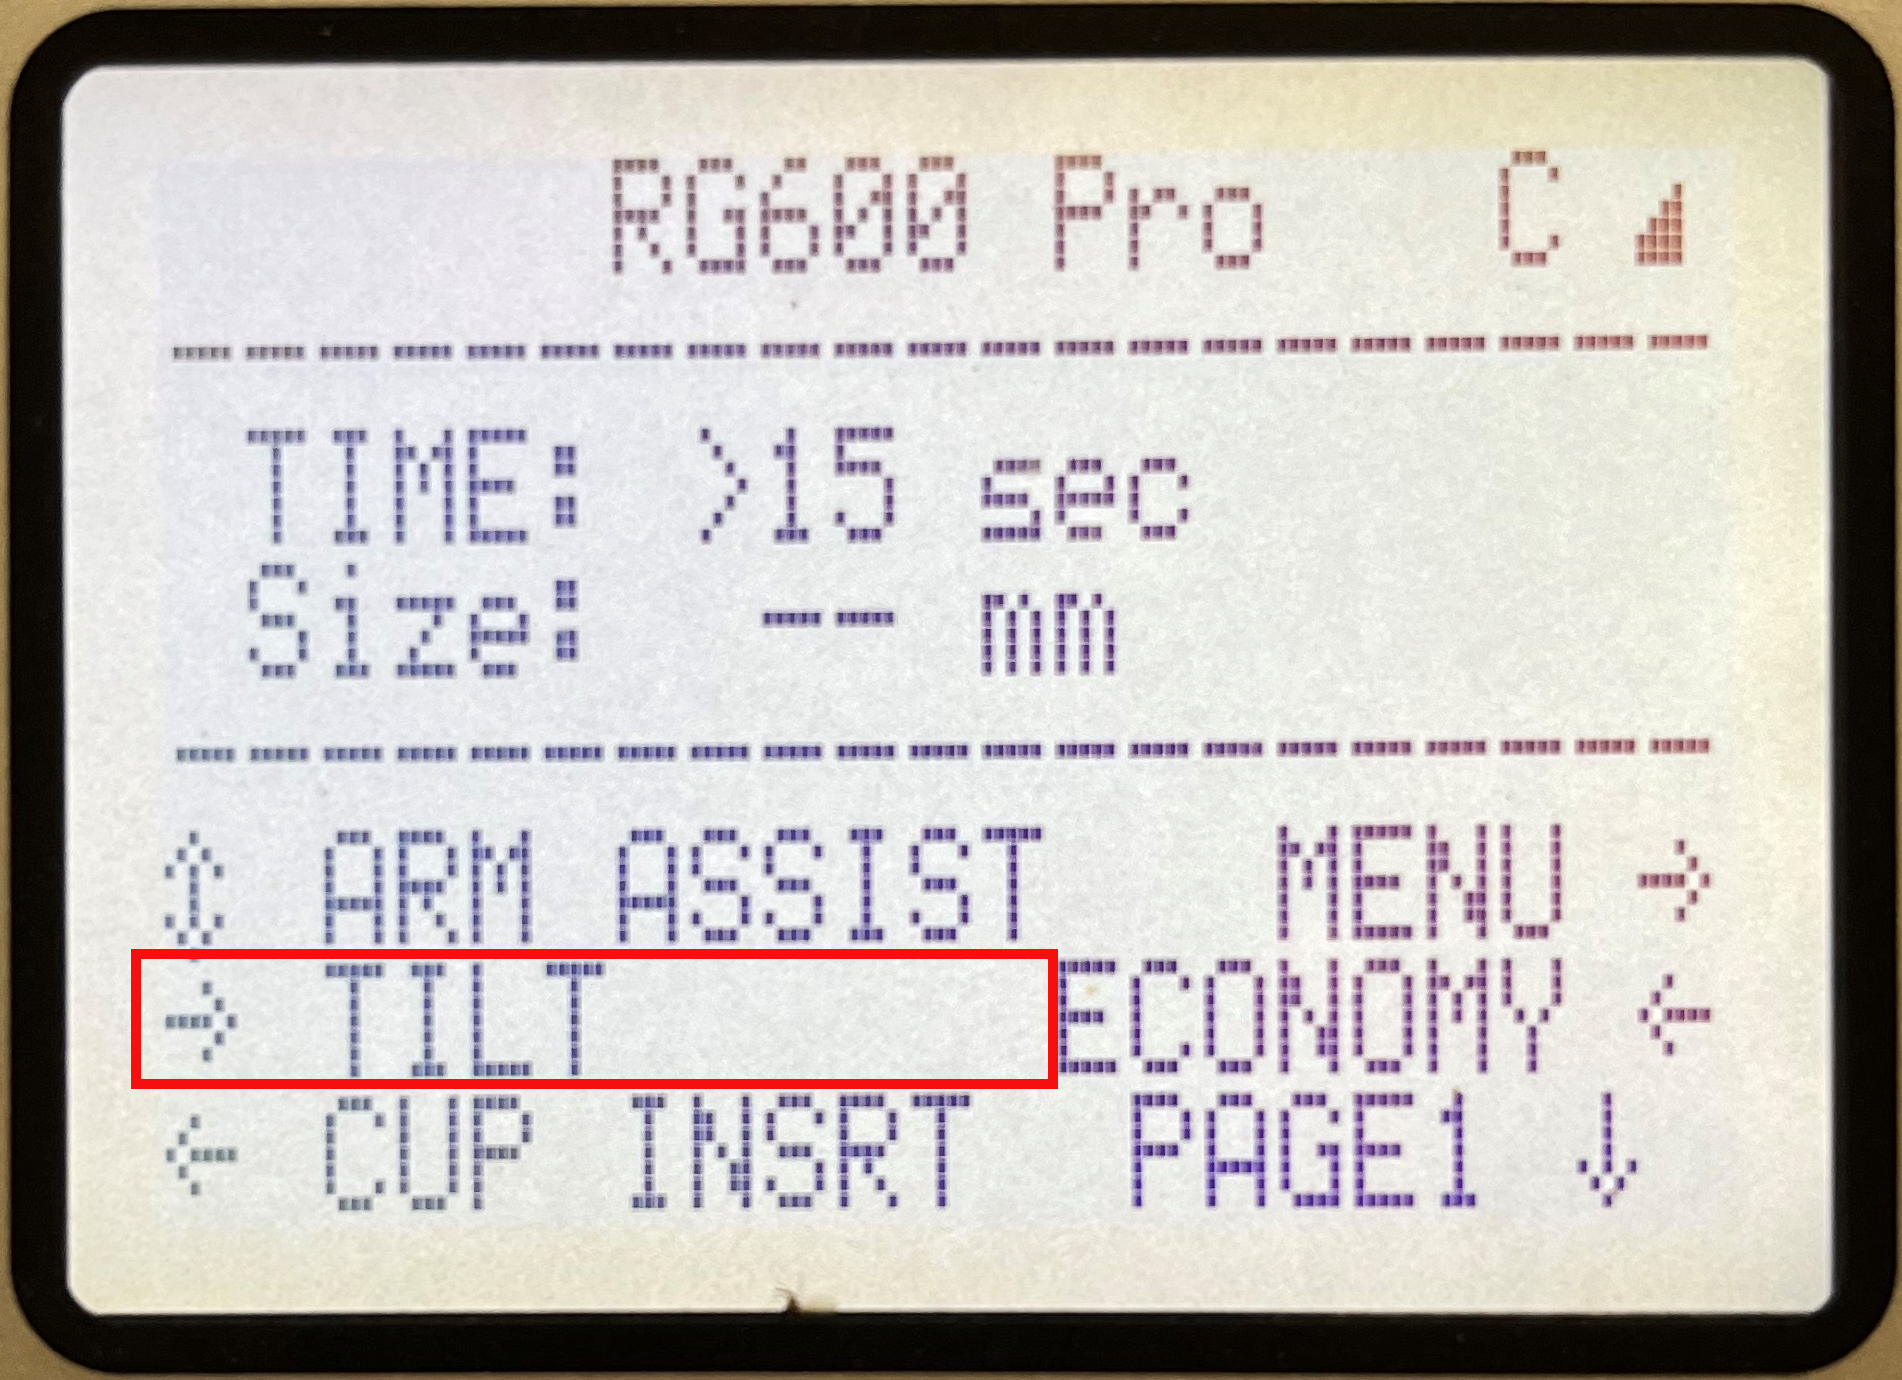
Setting bit table angle using the tilt function. NOTE: This is only available on page 1. Toggle the left joystick forwards towards you and hold the joystick in this position. Set the angle by using the rotating knob on the right hand side. When you release the left joystick the table will start to tilt to selected angle. If you toggle the left joystick backwards, the bit table will return to 'home' position of 0 degrees. |
 |
|
Clamping bits in bit holders. NOTE: This is only available on page 0. When clamping a bit in the RIGHT bit holder:
|
 |
|
When clamping a bit in the LEFT bit holder:
|
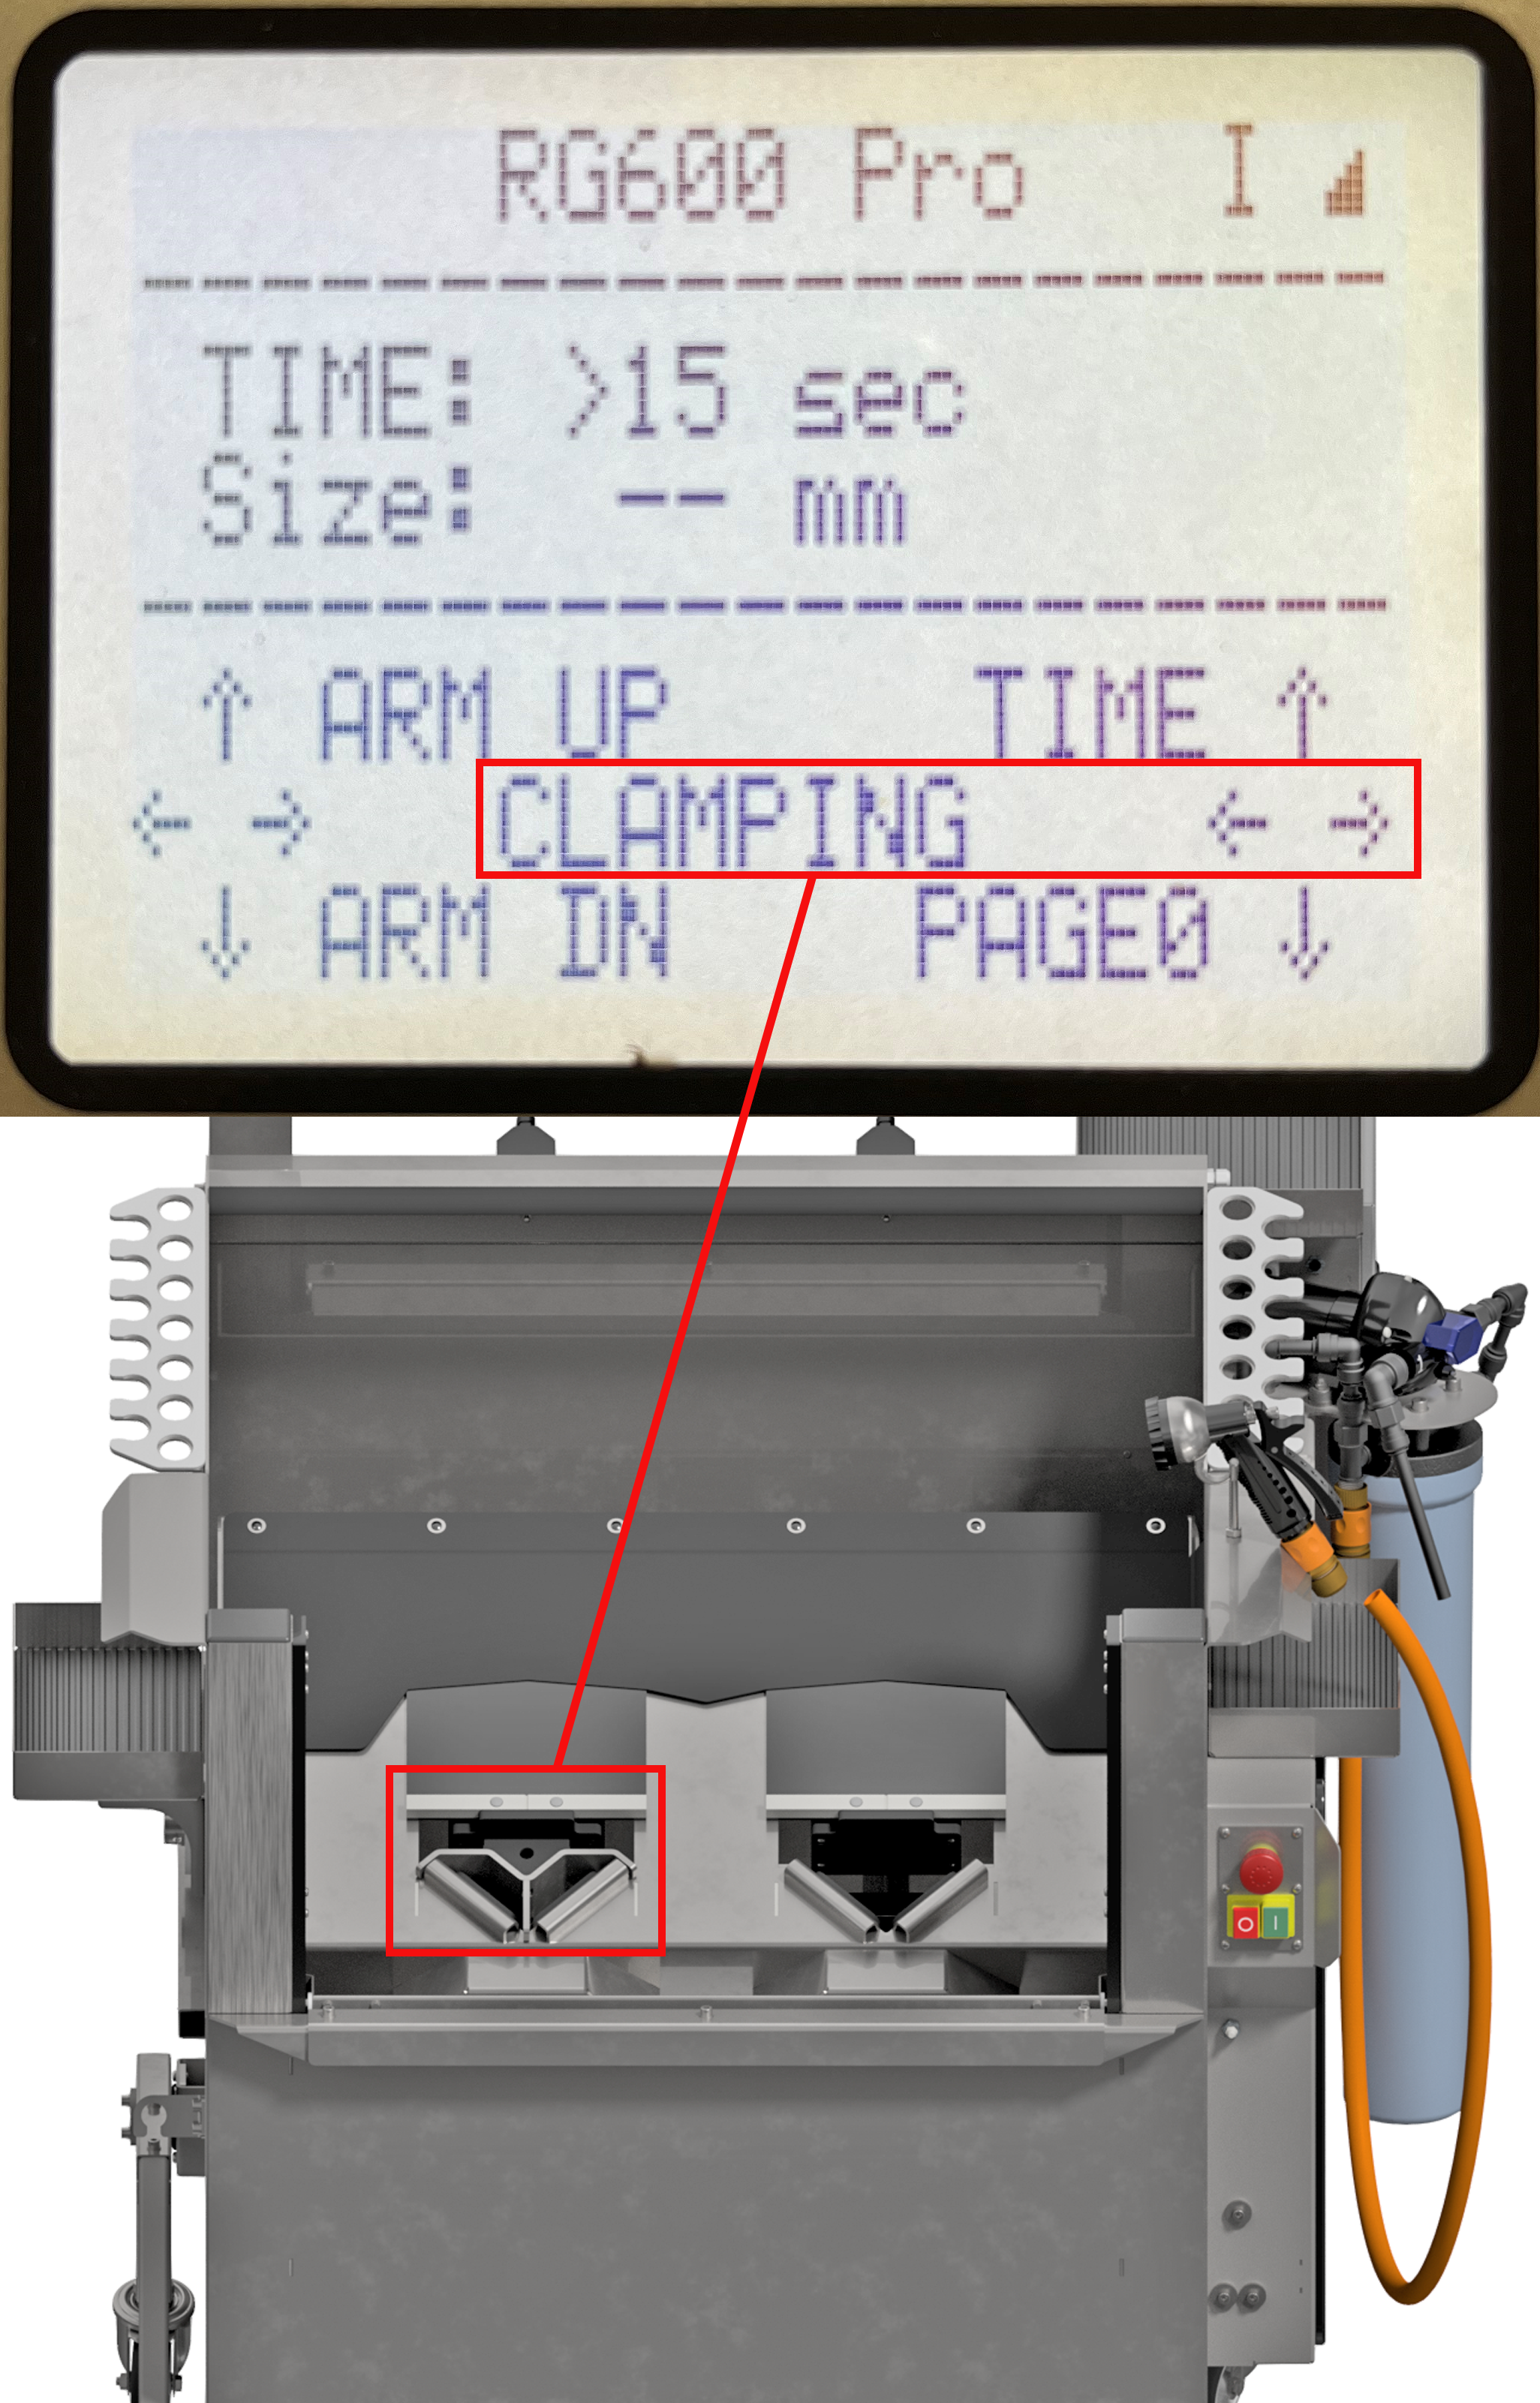 |
NOTE: During normal operation, clamping of the bit is done in safe mode. This is to avoid the risk of pinching or crushing. Full force clamping of bits is activated automatically when the sharpening cycle begins.
More information on Full Force Clamping will be provided in module 3: Machine Operation.
|
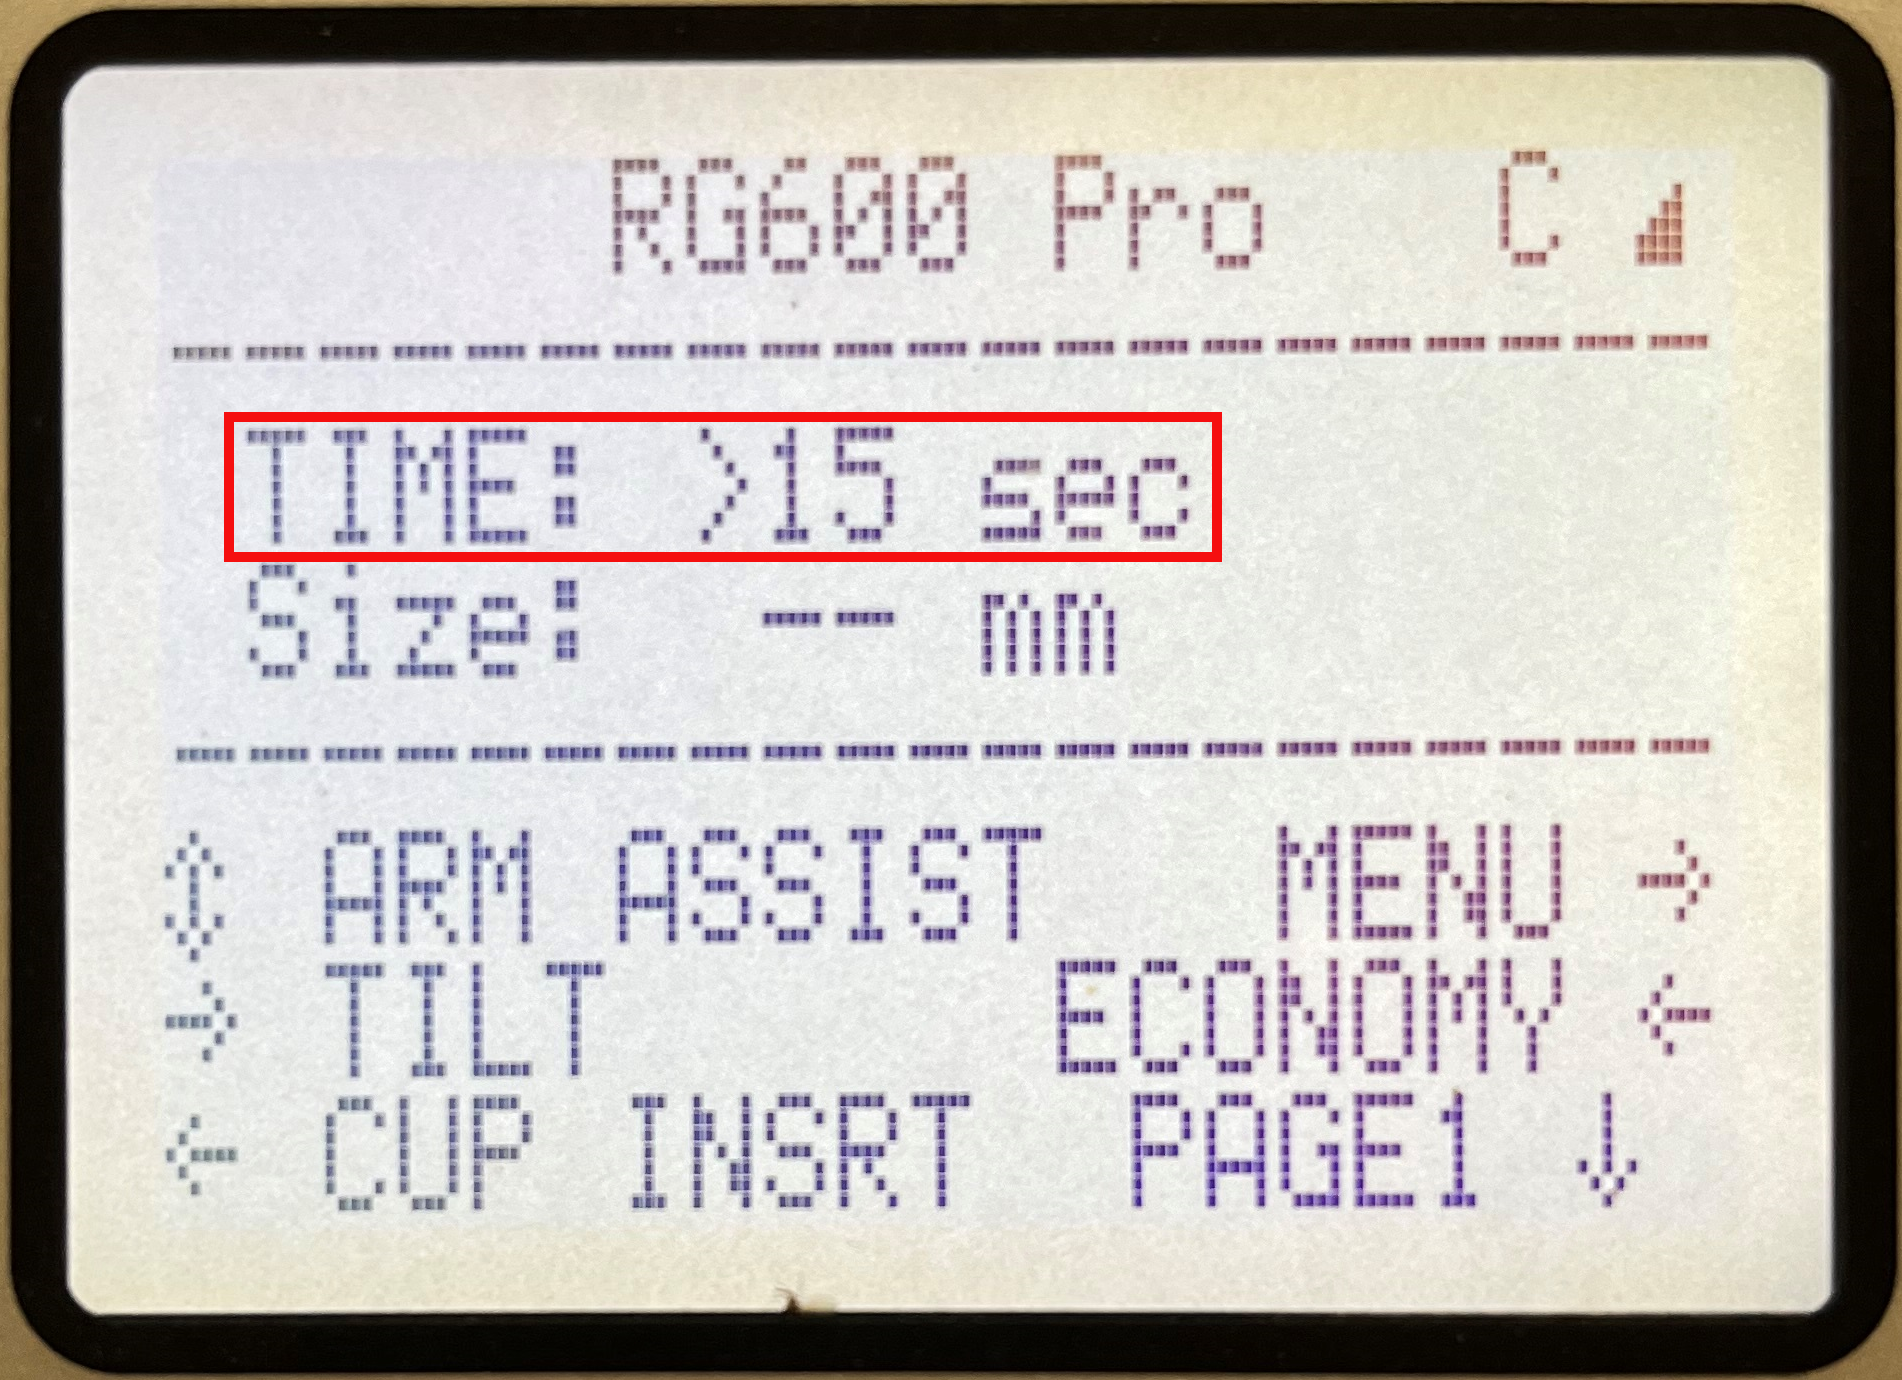
The Sharpening cycle time is set by using the rotating knob on the right hand side. The time selected is displayed on both page 0 and 1. When toggling the right joystick up you switch between normal sharpening time and extra sharpening time. Extra sharpening time should be used for finalising the shape of the button bit. The first sharpening cycle should always be with normal sharpening time. |
 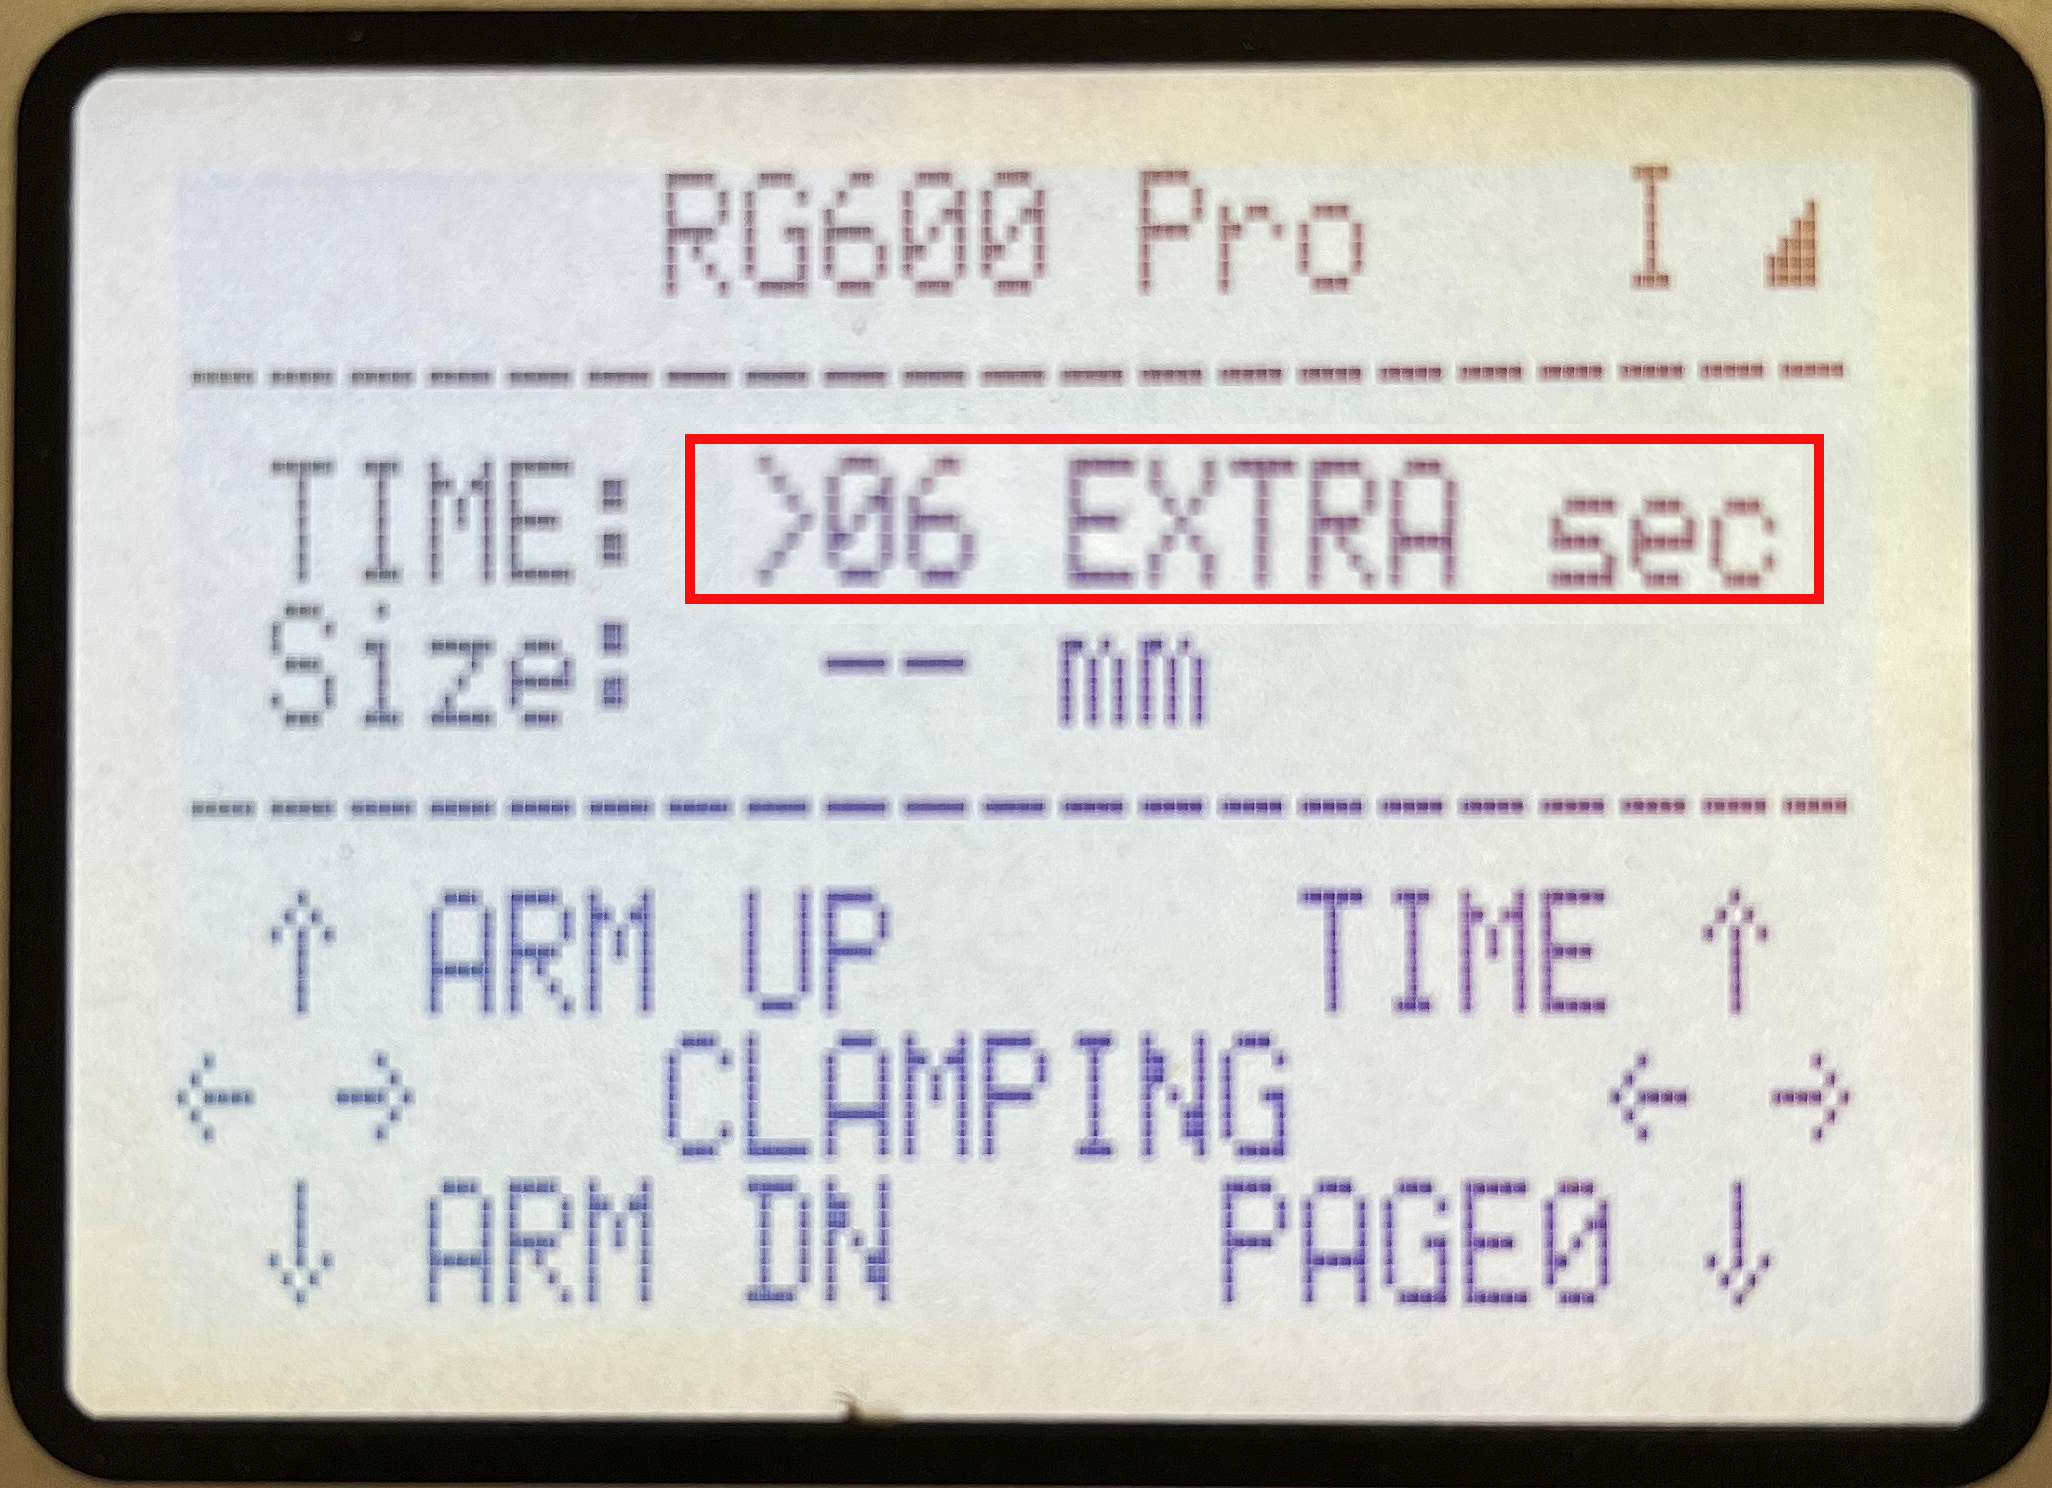 |
More information between Normal Time and Extra Time will be provided in module 3: Machine Operation.
|
Your RG600PRO sharpener can perform in two different sharpening modes: ECONOMY and PERFORMANCE mode. ECONOMY is the normal and recommended mode. You can switch to PERFORMANCE mode with the right joystick. On page 1 toggle the right joystick forward. PERFORMANCE mode should only be used when long sharpening cycles are required (30sec +). In performance mode the sharpening tools experience significantly more wear. |
 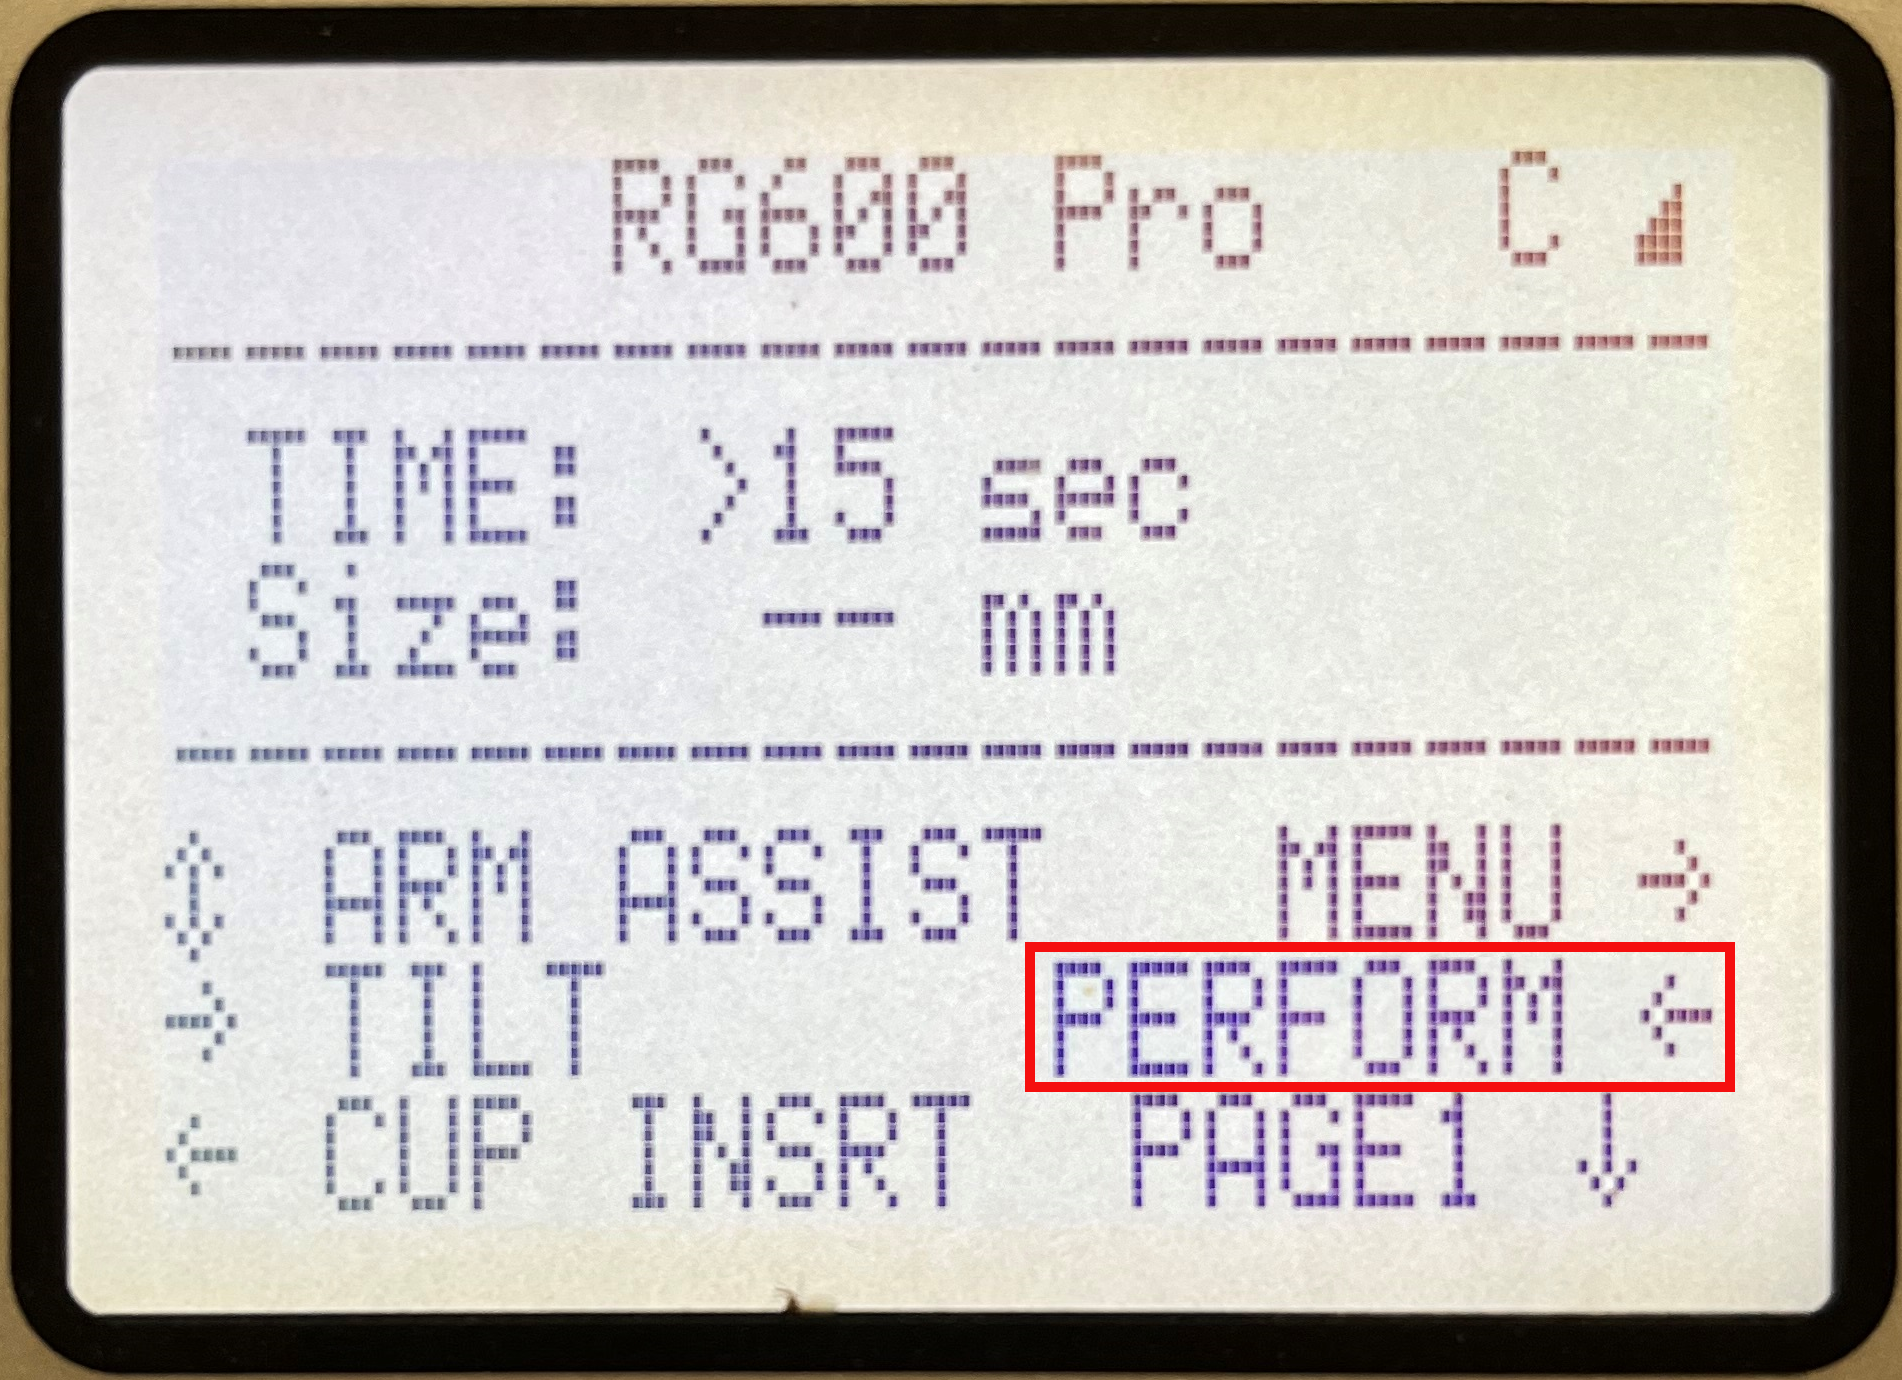 |
More information on PERFORMANCE mode will be provided in module 3: Machine Operation.
|
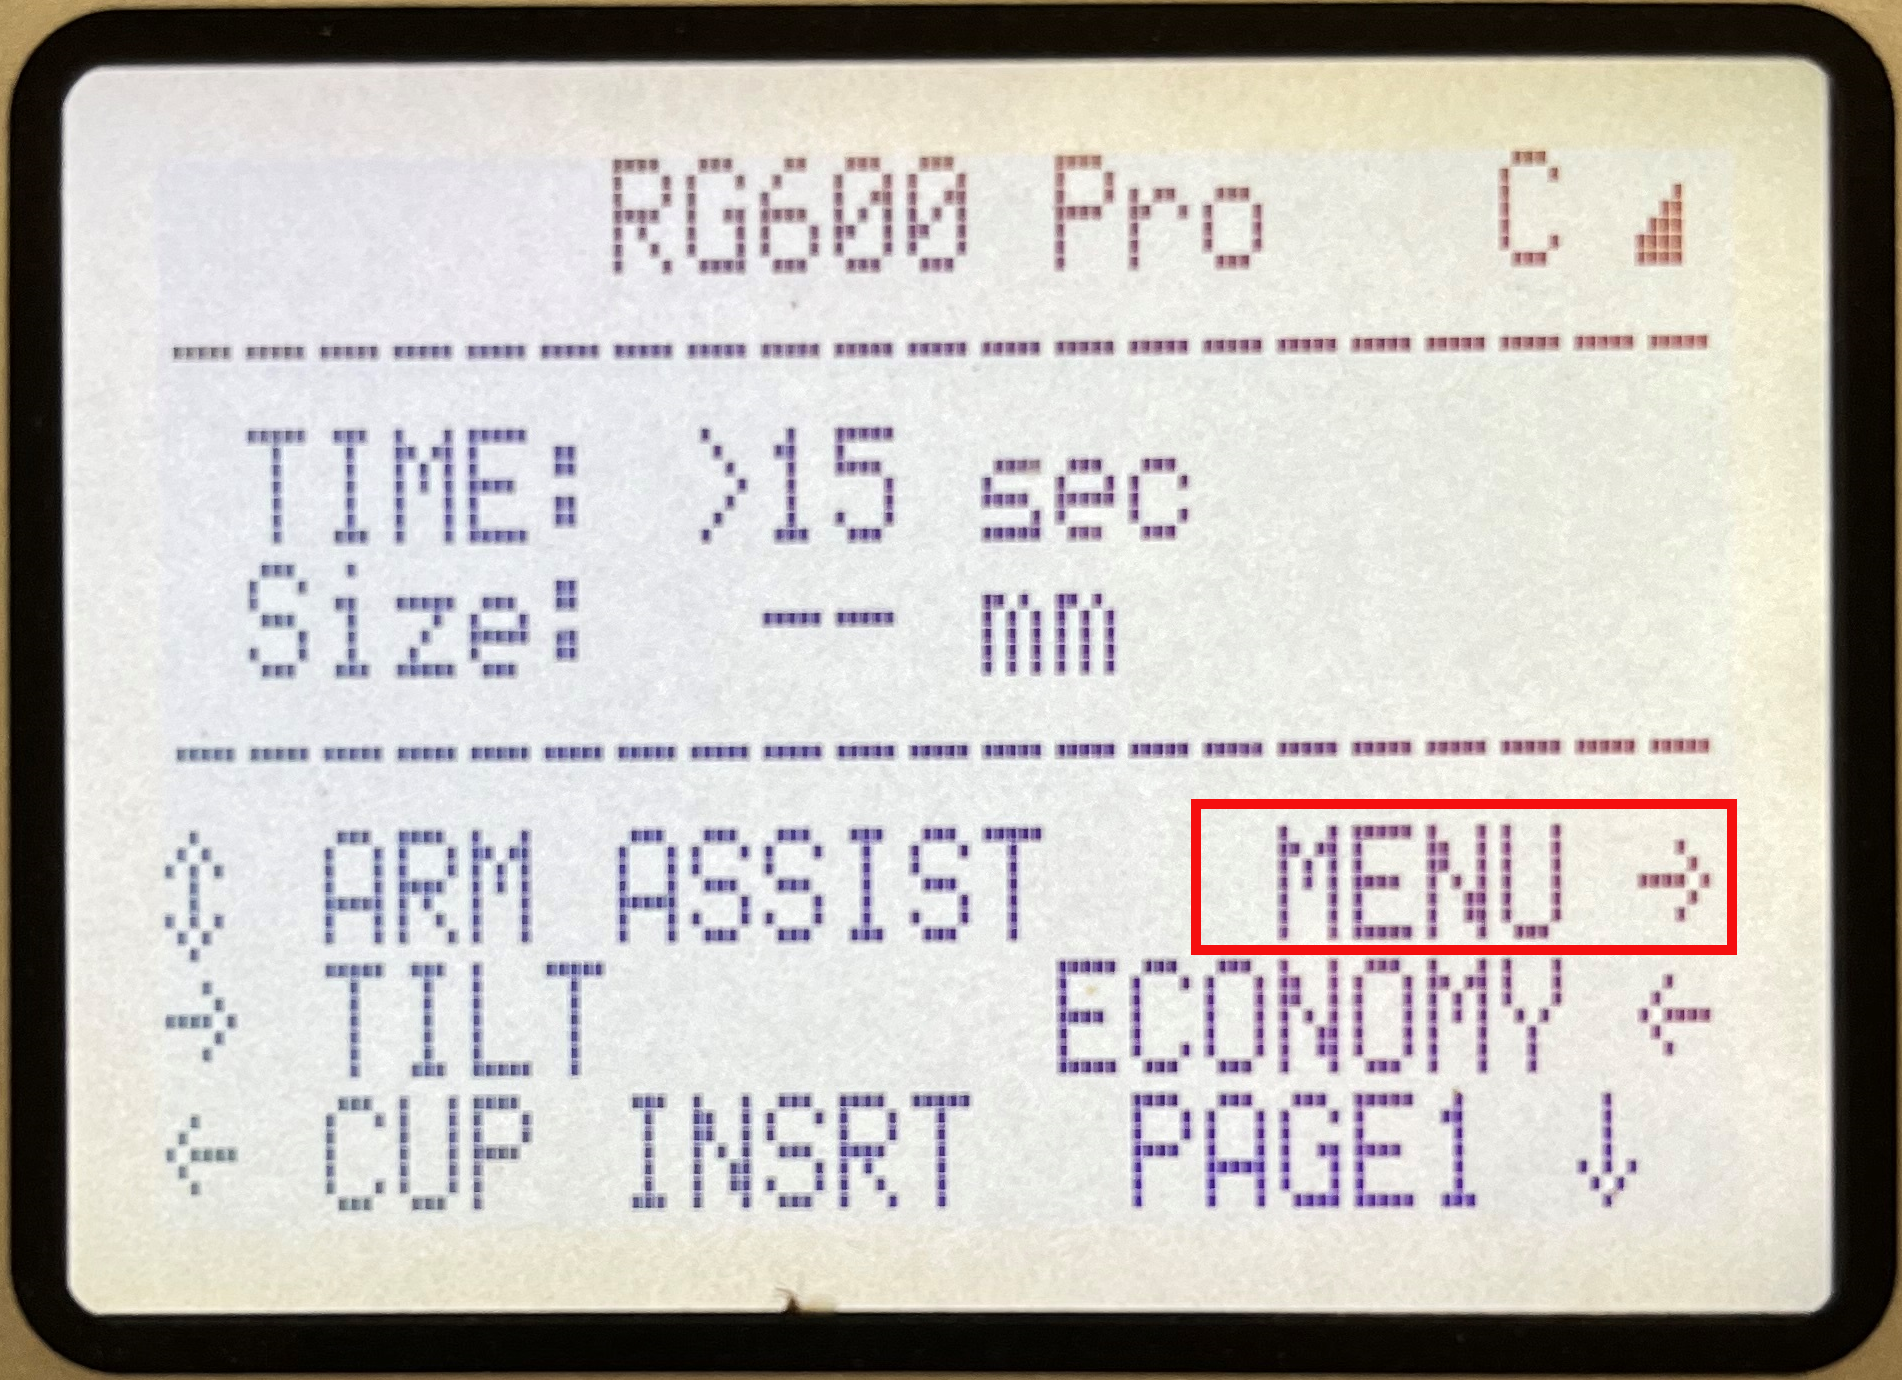
You can enter the machine menu to individually control some machine functions and read valuable information from sensors. This functionality is mostly used for troubleshooting your RG600PRO. You access the menu while on page 1 toggling and holding the right joystick backwards and then pressing the Start button. |
 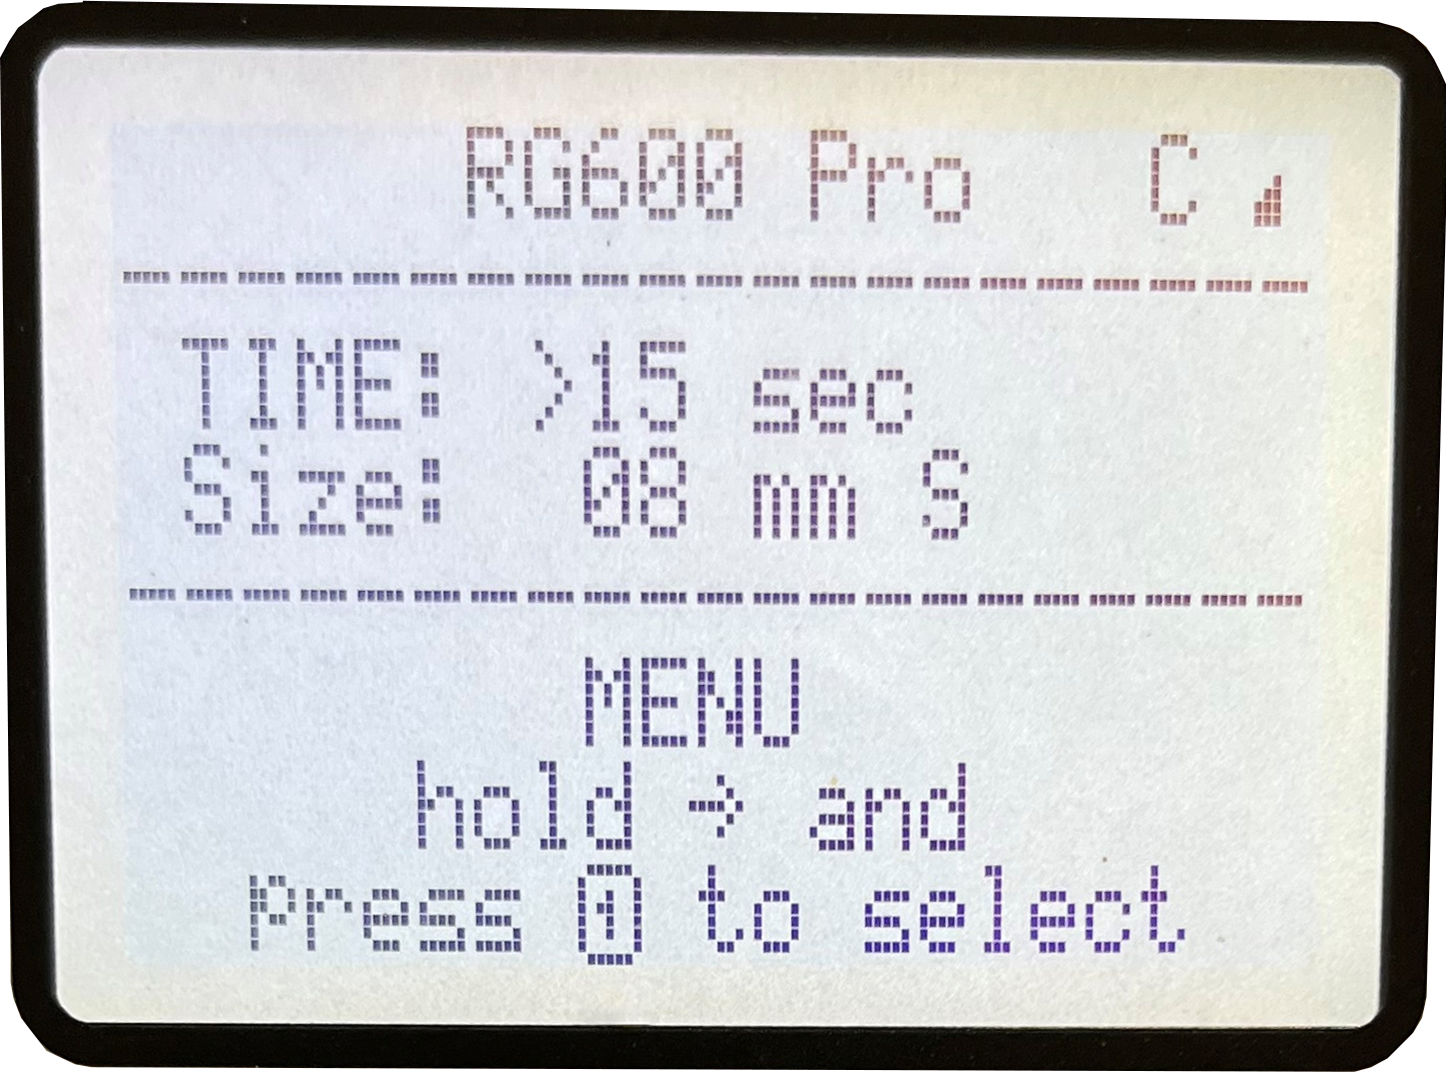 |
More information on using the service menu and troubleshooting your RG600PRO will be provided in module 4: Maintenance and Service.
|
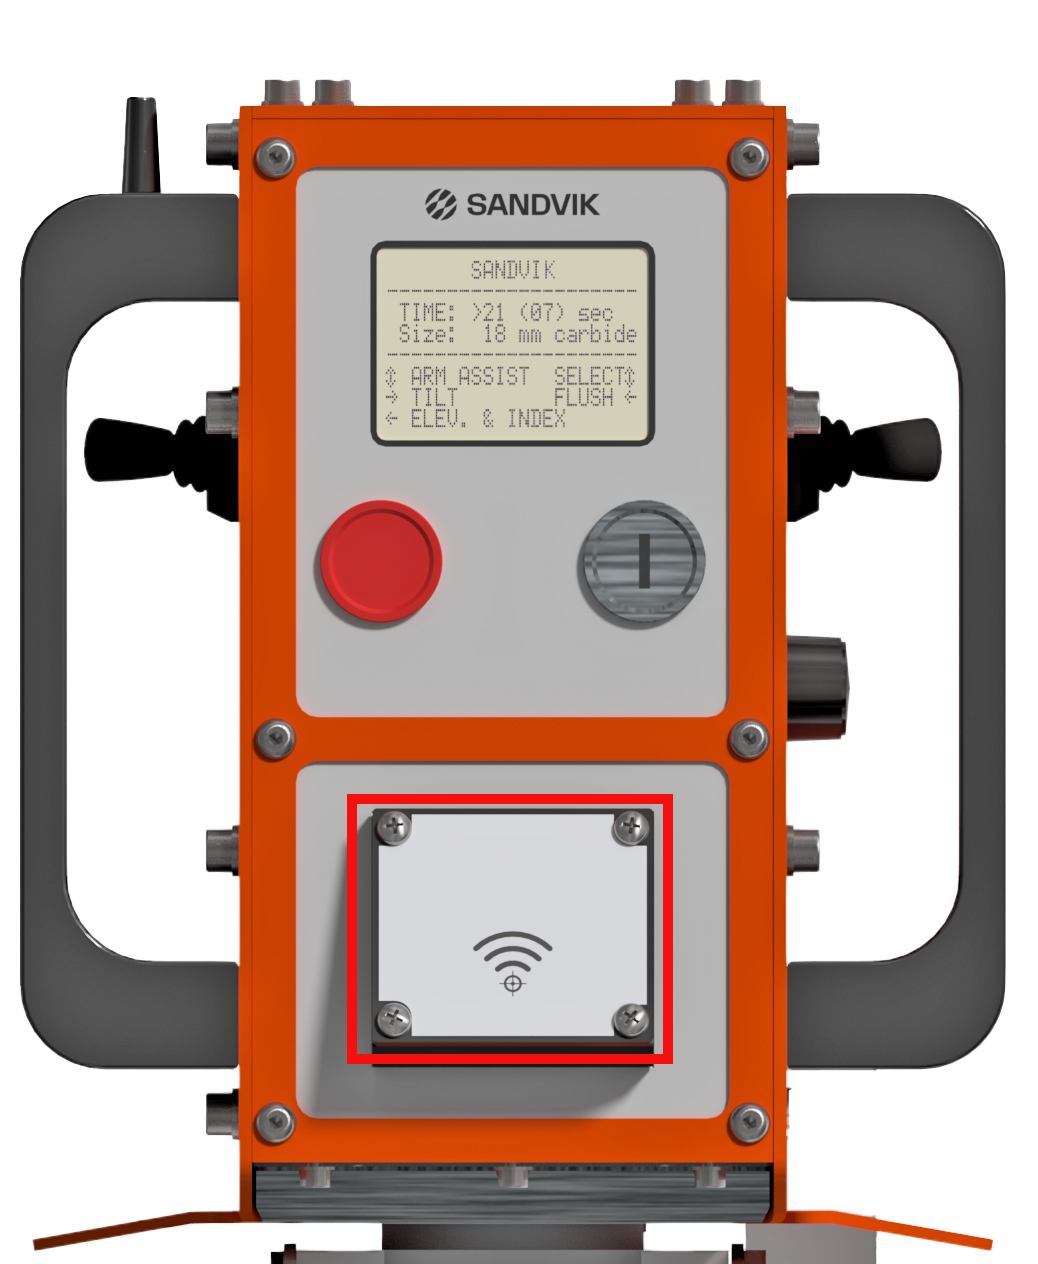
Your RG600PRO sharpener is equipped with an RFID scanner on the control panel. This scanner will be used to scan the shaprning tools you are using as well as the Operator card of the person operating the machine. |
 |
|
An operator card must be scanned in order to operate your RG600PRO sharpener. After the operator card has been scanned, the card number will be visible in the top left corner on page 0. If the machine stand idle for 30min, this operator card will be automatically logged off. The card would need to be rescanned before sharpening can commence. The sharpening tool |
 |
Error / Warning / Info codes
Please use the arrows at the top to proceed to the next section.